How to Make a Bow on a Gift Box: Easy Steps for Perfect Wraps
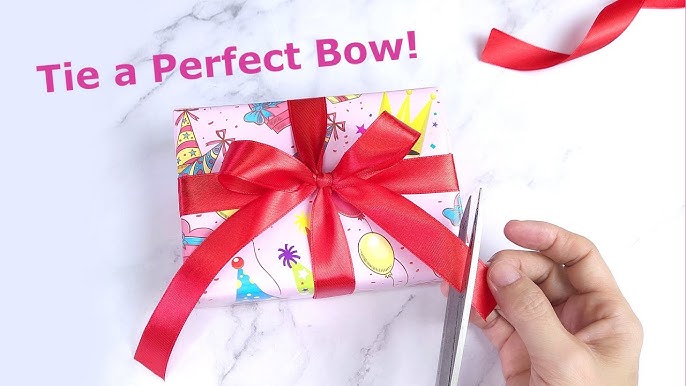
Giving a gift is special, but the way you wrap it can make your present unforgettable. Imagine your gift sitting on the table, catching everyone’s eye because of a beautiful bow on top.
You might think making a bow is tricky, but it doesn’t have to be. In this guide, you’ll learn simple steps to create a stunning bow that adds that perfect finishing touch to your gift box. By the end, your gifts will look professional and heartfelt, making every moment of giving even more meaningful.
Ready to impress? Let’s get started!
Choosing The Right Ribbon
Choosing the right ribbon can transform a simple gift box into something truly special. The ribbon you pick sets the tone and adds personality to your present. Think about the message you want your gift to send and how the ribbon can help you say it.
Types Of Ribbons
Ribbons come in many materials, each offering a different look and feel. Satin ribbons are smooth and shiny, perfect for elegant gifts. Grosgrain ribbons have a ribbed texture and provide a more casual, sturdy appearance.
Organza ribbons are sheer and delicate, ideal for romantic or feminine gifts. Burlap ribbons offer a rustic charm, great for handmade or eco-friendly presents. Consider how the texture of the ribbon complements your wrapping paper and the overall vibe you want.
Matching Ribbon To Occasion
Are you wrapping a birthday gift, wedding present, or holiday surprise? The occasion should guide your ribbon choice. Bright, colorful ribbons work well for birthdays and celebrations, while soft pastels or whites suit weddings.
For holidays like Christmas, rich reds, greens, and golds bring festive cheer. Think about the recipient’s style too—would they appreciate a bold statement or something understated? Your ribbon can make your gift feel more thoughtful and fitting.
Selecting Ribbon Width
The width of your ribbon affects how bold or delicate your bow looks. Narrow ribbons (around 1/4 inch) add subtle detail and work well on small boxes or for layering. Wider ribbons (2 inches or more) create dramatic, eye-catching bows perfect for large packages.
Combining different widths can add depth and interest. Have you tried mixing a thin ribbon over a wider one for a layered effect? Experiment with widths to find the balance that suits your gift size and the statement you want to make.

Credit: carpentercore.com
Preparing The Gift Box
Preparing the gift box is the first step to making a beautiful bow. A well-prepared box makes the bow stand out and look elegant. Taking time to wrap the box neatly sets a strong base for your decoration.
Wrapping The Box Neatly
Choose smooth wrapping paper without wrinkles. Cut enough paper to cover the entire box. Fold the paper tightly around the box edges. Crease the corners sharply for a clean look. Avoid loose or torn paper for best results.
Securing The Paper
Use clear tape to hold the paper in place. Tape under the box edges to hide it. Avoid too much tape that causes bumps. Press the tape firmly so it does not peel off. Make sure the paper stays smooth and tight.
Positioning The Ribbon
Pick a ribbon that matches your gift paper. Place the ribbon across the box center. Wrap it evenly around all sides. Cross the ribbon on the box bottom for support. Bring the ends back to the top for the bow.
Basic Bow Techniques
Basic bow techniques help create beautiful decorations for gift boxes. These bows add charm and make gifts look special. Learning simple bow styles improves your gift-wrapping skills quickly.
Each bow style uses ribbon in a unique way. These bows suit different occasions and gift sizes. Practice these techniques to find your favorite look.
Classic Bow Tie
The classic bow tie is familiar and elegant. Start by wrapping the ribbon around the box. Cross the ribbon ends, then loop one end under the other. Pull tight to form a knot.
Create two loops, one with each ribbon end. Cross the loops and tuck one under the other. Pull gently to tighten the bow. Adjust the loops to make them even and neat.
Simple Loop Bow
The simple loop bow is quick and easy. Fold the ribbon into two loops, leaving tails at the ends. Cross the loops over each other.
Pull one loop through the gap under the other. Tighten the bow by pulling the loops and tails. Trim the ribbon ends to your desired length for a clean look.
Double Loop Bow
The double loop bow looks fuller and fancier. Make two loops on each side of the ribbon. Hold the center tightly to keep the loops in place.
Cross the loops and tie them in the middle. Pull the loops gently to shape the bow. Fluff each loop to create volume and style.

Credit: www.youtube.com
Advanced Bow Styles
Advanced bow styles take your gift wrapping from simple to stunning. These designs add a unique flair that shows extra care and creativity. If you want your gift to stand out, try mastering these eye-catching bows.
Floral Bow
The floral bow mimics the look of a blooming flower and adds a natural touch to your gift. Start with wide ribbon loops arranged in a circle, layering smaller loops inside to create depth. Finish by shaping the ends to look like petals and securing a small knot or bead in the center.
This style works beautifully with satin or organza ribbons. Have you ever noticed how a well-made floral bow can turn a simple box into a centerpiece? It’s perfect for birthdays or special occasions where presentation matters.
Pom-pom Bow
Pom-pom bows bring a playful and fluffy texture to your package. You create these by cutting multiple short strips of ribbon and bunching them together tightly in the center. Fluff the ends out evenly to form a round, pom-pom shape.
Try mixing different ribbon colors or textures to add more visual interest. This bow style is great if you want to add a fun, casual vibe to your wrapping. Imagine the surprise when someone sees this cheerful bow on their gift!
Layered Ribbon Bow
The layered ribbon bow combines ribbons of various widths and colors to create a rich, textured look. Begin by stacking ribbons with contrasting patterns or shades, then loop and twist them into a bow. Secure the center with a tight knot or a small piece of wire.
This bow style lets you experiment with color combinations and materials, making each gift unique. Do you have a favorite color palette you want to try? Layering ribbons allows you to customize the bow to fit any theme or occasion perfectly.
Tips For Perfect Bows
Creating the perfect bow can make any gift look special. Simple tips help you craft neat, beautiful bows every time. Focus on ribbon choice, size, and how tightly you secure it. These details bring elegance and charm to your gift wrapping.
Using Wire-edged Ribbon
Wire-edged ribbon holds its shape well. The thin wire along edges allows easy bending and shaping. You can fluff the loops to look full and even. This ribbon type keeps your bow looking neat for longer.
Adjusting Bow Size
Match the bow size with the gift box size. Large boxes look better with big, bold bows. Small boxes need smaller, delicate bows. Adjust loop size and the number of loops for balance. Too many loops can look messy on small boxes.
Securing The Bow Firmly
Keep the bow in place using strong knots or wire ties. A loose bow can fall apart or move around. Twist the wire or knot tightly at the bow’s center. Use double knots if needed to hold it firmly. This keeps your bow perfect during handling and transport.
Creative Bow Alternatives
Creative bow alternatives can make your gift stand out. They offer unique looks that simple ribbon bows can’t match. These options bring charm and personality to any present. Using different materials and ideas creates fresh, eye-catching designs.
Using Twine Or Yarn
Twine and yarn are perfect for a rustic, cozy feel. Wrap them around the box several times for texture. Tie a simple knot or a loose bow for a relaxed look. Choose colors that match the gift wrap or contrast nicely.
Thicker yarn adds softness, while thin twine gives a natural touch. These materials work well for handmade or eco-friendly gifts. They also make it easy to add small decorations.
Incorporating Decorative Elements
Decorative elements add flair and interest to your gift. Attach small pine cones, dried flowers, or tiny ornaments to the bow area. Use glue or tie them directly with twine or ribbon.
Other ideas include buttons, beads, or colorful feathers. These extras create a custom look that feels thoughtful. Mix and match decorations to fit the gift occasion.
Personalizing With Tags
Tags can make gifts more personal and special. Write a short message, the recipient’s name, or a fun note. Attach the tag to the bow or twine with a small clip or string.
Choose tags in different shapes, sizes, and materials. Kraft paper tags offer a rustic style, while shiny ones look elegant. Personalizing shows extra care and makes gifts memorable.

Credit: www.youtube.com
Frequently Asked Questions
How Do I Make A Simple Bow For A Gift Box?
To make a simple bow, cut a length of ribbon, form loops, and tie them in the center. Adjust the loops evenly for a neat look. Secure with ribbon tails and trim ends for a polished finish.
What Materials Are Best For Gift Box Bows?
Satin, grosgrain, or organza ribbons work best for gift box bows. These materials hold shape well and add elegance. Choose ribbon width based on the box size for balanced decoration.
How Can I Attach A Bow Securely To A Gift Box?
Use double-sided tape or hot glue to attach the bow securely. Place the adhesive on the bow’s back and press firmly on the box. This prevents movement and keeps the bow intact during handling.
What Are Creative Bow Styles For Gift Wrapping?
Try styles like pom-pom bows, layered loops, or floral bows for creative wrapping. Experiment with different ribbon textures and colors for unique effects. These styles add visual interest and make gifts stand out.
Conclusion
Creating beautiful bows adds charm to any gift box. Practice makes it easy. Follow simple steps for a neat finish. Choose ribbon colors that match the occasion. Use scissors carefully for clean cuts. Pull tight for a firm bow. Adjust loops for a balanced look.
A perfect bow brings joy to the giver and receiver. Gift wrapping becomes an art with thoughtful touches. Share the happiness with your loved ones. Celebrate moments with lovely bows. You can create memorable gifts with these simple bow techniques.
Enjoy the process of gift wrapping and spread smiles.

Similar Posts