How Do I Make a Gift Box: Easy DIY Tutorial
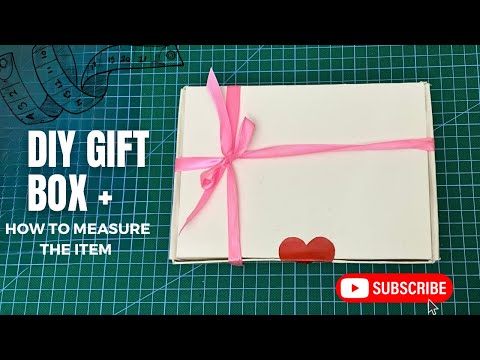
Are you looking to add a personal touch to your gifts? Making your own gift box is easier than you think, and it can turn a simple present into something truly special.
Imagine the smile on your loved one’s face when they receive a beautifully crafted box made just for them. You’ll discover simple steps to create a gift box that looks professional but requires only basic materials. Ready to impress with your creativity?
Let’s dive in and make your gift unforgettable!
Materials Needed
Creating a gift box requires a few basic materials. Choosing the right supplies helps the box look neat and strong. The materials also make it easier to assemble and decorate. Here are the main categories of materials you will need to gather before starting.
Paper And Cardboard Options
Select sturdy paper or cardboard as the base of your gift box. Cardstock offers a good balance of thickness and flexibility. Corrugated cardboard provides extra durability for heavier gifts.
- Colored cardstock for a vibrant look
- Plain white or kraft paper for a simple style
- Patterned scrapbook paper for decorative designs
- Recycled cardboard for an eco-friendly choice
Pick a material that matches your gift size and theme.
Cutting Tools
Sharp cutting tools make clean, precise edges. This helps your box hold shape and fit together well. Choose tools that are safe and easy to handle.
- Scissors for general cutting tasks
- Craft knife for detailed or straight cuts
- Metal ruler to guide straight cutting lines
- Cutting mat to protect your work surface
Keep tools sharp and use caution to avoid accidents.
Adhesives And Decorations
Adhesives hold your box together firmly. Decorations add a personal and festive touch. Use materials that dry clear and stay strong over time.
- Double-sided tape for a clean, no-mess bond
- Glue sticks for light paper adhesion
- Hot glue gun for heavy or textured materials
- Ribbons, stickers, and washi tape for decoration
- Markers or stamps to add custom designs
Select adhesives and decorations that suit your box style and purpose.

Credit: www.youtube.com
Choosing The Right Size
Choosing the right size for your gift box is crucial. A box that’s too big makes your gift look lost, while one that’s too small can cause damage or frustration. Getting the size just right not only protects your gift but also makes the presentation feel thoughtful and polished.
Measuring Your Gift
Start by measuring your gift’s length, width, and height with a ruler or tape measure. Write down these dimensions carefully. Remember to account for any extra space needed for wrapping paper, tissue, or padding.
Think about the shape of your gift. Is it flat, tall, or oddly shaped? This will affect how you measure and choose the box size. For example, a tall bottle needs a deeper box than a flat book.
Adjusting Box Dimensions
Add about 1 to 2 inches to each measurement to allow room for cushioning materials like bubble wrap or tissue paper. This extra space prevents damage during handling.
If your gift has delicate parts, consider adding even more padding space. You can also choose a box with dividers or compartments to keep items separate and secure.
Ask yourself: Would you feel comfortable if this box were handed to you? If the answer is no, adjust the size until it feels just right. Your gift deserves a box that fits perfectly, just like a glove.
Cutting The Box Template
Cutting the box template is an important step in making a gift box. It sets the shape and size of your box. This process needs careful attention to get neat edges and proper folds. Preparing the template correctly makes assembly easier and the final box more sturdy.
Drawing The Template
Start by drawing the box template on thick paper or cardstock. Use a ruler and pencil for straight lines. Mark the main square or rectangle for the box base. Add flaps on all sides for folding and gluing. Keep the lines clear but light for easy erasing.
- Measure the dimensions carefully to fit your gift.
- Include tabs to connect box parts securely.
- Double-check all sides are equal and balanced.
Scoring Fold Lines
Scoring helps fold the paper neatly without cracking. Use a bone folder or the back of a butter knife. Score along all fold lines gently. This creates a small groove that guides folding. Make sure not to cut through the paper while scoring.
- Score inside the fold lines, not on them.
- Keep the pressure even for smooth folds.
- Check folds by gently bending along the scored lines.
Folding And Assembling
Folding and assembling your gift box is where your creation truly takes shape. This stage requires precision and patience to ensure your box looks neat and professional. Paying close attention here can make the difference between a flimsy container and a sturdy, beautiful gift holder.
Folding Tips For Clean Edges
Sharp, clean edges make your gift box stand out. To achieve this, score the fold lines lightly with a bone folder or the back of a butter knife before folding. This helps the paper bend exactly where you want it without cracking or tearing.
Fold slowly and press firmly along each edge. You want crisp creases that hold their shape but avoid over-folding, which can weaken the paper. If you struggle with uneven folds, try aligning your paper against a ruler or straight edge before folding.
Gluing The Sides
Choose a glue that dries clear to keep your box looking tidy. Apply glue in small amounts to the tabs—too much glue can cause warping or mess. Use a fine-tip applicator or a small brush for precise control.
Press the glued sides firmly together and hold them in place for at least 30 seconds. If possible, use binder clips or clothespins to maintain pressure while the glue sets. Remember, a well-glued box holds its shape better and lasts longer.
Adding Decorative Touches
Adding decorative touches to your gift box makes it special and memorable. Simple details can turn a plain box into a beautiful surprise. These touches show care and thoughtfulness in your gift-giving. Small decorations create excitement even before the gift is opened. Below are easy ways to decorate your gift box creatively.
Painting And Wrapping
Painting your gift box adds a personal and colorful touch. Use acrylic or water-based paints for bright and smooth finishes. Choose colors that match the occasion or the recipient’s favorite shades. You can paint patterns like stripes, dots, or flowers.
Wrapping paper is a classic way to decorate a gift box. Pick wrapping with fun prints or elegant designs. Use double-sided tape to keep the paper neat and tight around the box. Wrapping paper can also protect the box and keep the gift inside safe.
Using Ribbons And Bows
Ribbons and bows add charm and a festive feel to gift boxes. Satin, grosgrain, or organza ribbons come in many colors and textures. Wrap the ribbon around the box and tie a neat bow on top or side. You can layer different ribbons for a richer look.
Bows come in many styles, from simple loops to elaborate shapes. Attach a bow with glue or tie it directly on the ribbon. Combine ribbons and bows with small decorations like dried flowers or tags for extra flair.

Credit: www.youtube.com
Creative Variations
Creative variations make gift boxes unique and personal. They allow you to tailor the box to the occasion or the receiver’s taste. Experimenting with shapes, sizes, and decorations turns a simple gift box into a memorable surprise.
Custom Shapes And Sizes
Gift boxes do not have to be square or rectangular. Try making heart-shaped, star-shaped, or even flower-shaped boxes. Use thicker paper or cardboard for sturdy designs. Adjust the size to fit the gift perfectly. Small boxes work great for jewelry, while larger ones suit clothes or toys. Custom sizes make the unwrapping experience more exciting and special.
Themed Decorations
Decorate gift boxes based on themes. Use colors, patterns, and stickers that match holidays or events. For example:
- Red and green with snowflakes for Christmas
- Pastel colors and flowers for spring
- Bold colors and balloons for birthdays
Adding ribbons, bows, or handmade tags enhances the theme. Personal touches show thoughtfulness and care.
Troubleshooting Common Issues
Creating a gift box can sometimes lead to small problems. These issues can affect the look and strength of your box. Fixing these troubles helps your gift box look neat and last longer. Here are some common problems and easy solutions to improve your box-making skills.
Fixing Uneven Edges
Uneven edges make your box look messy. To fix this, use a ruler and a sharp craft knife. Cut slowly along the lines for clean edges. Sandpaper can smooth rough edges gently. Fold edges carefully to keep straight lines. Press folds firmly with a bone folder or a flat tool. These steps give your box a tidy and professional look.
Strengthening Weak Areas
Weak areas cause your box to lose shape or break. Reinforce corners with extra glue or tape. Add small strips of cardboard inside corners for more support. Use thicker paper or cardstock for stronger walls. Avoid bending the box too much to keep its shape. These tips make your gift box sturdy and reliable for holding gifts safely.

Credit: www.youtube.com
Frequently Asked Questions
How Do I Start Making A Gift Box?
Begin by choosing sturdy paper or cardboard. Cut to your desired size, then fold edges to form the box shape. Secure with glue or tape for a strong hold.
What Materials Are Best For Gift Boxes?
Use thick cardstock, craft paper, or corrugated cardboard. These materials are durable, easy to fold, and provide a neat finish for your gift box.
How Can I Decorate A Homemade Gift Box?
Add ribbons, stickers, or patterned paper. Use stamps or paint for personalized touches. Keep decorations simple for a clean, elegant look.
How Do I Make A Gift Box Lid?
Cut a slightly larger piece than the base. Fold edges similarly and assemble. This ensures the lid fits snugly over the box.
Conclusion
Making a gift box is simple and fun. You only need a few materials and some patience. Follow the steps carefully, and you will have a beautiful box. Personal touches make your gift extra special. Practice a few times to improve your skills.
Handmade boxes show care and effort. Try different sizes and decorations to match your gift. Enjoy the process and share your creations with friends. Crafting your own gift box adds a warm touch to any present. Give it a try today!

Similar Posts