How Do You Make a Paper Gift Box: Crafting Tips
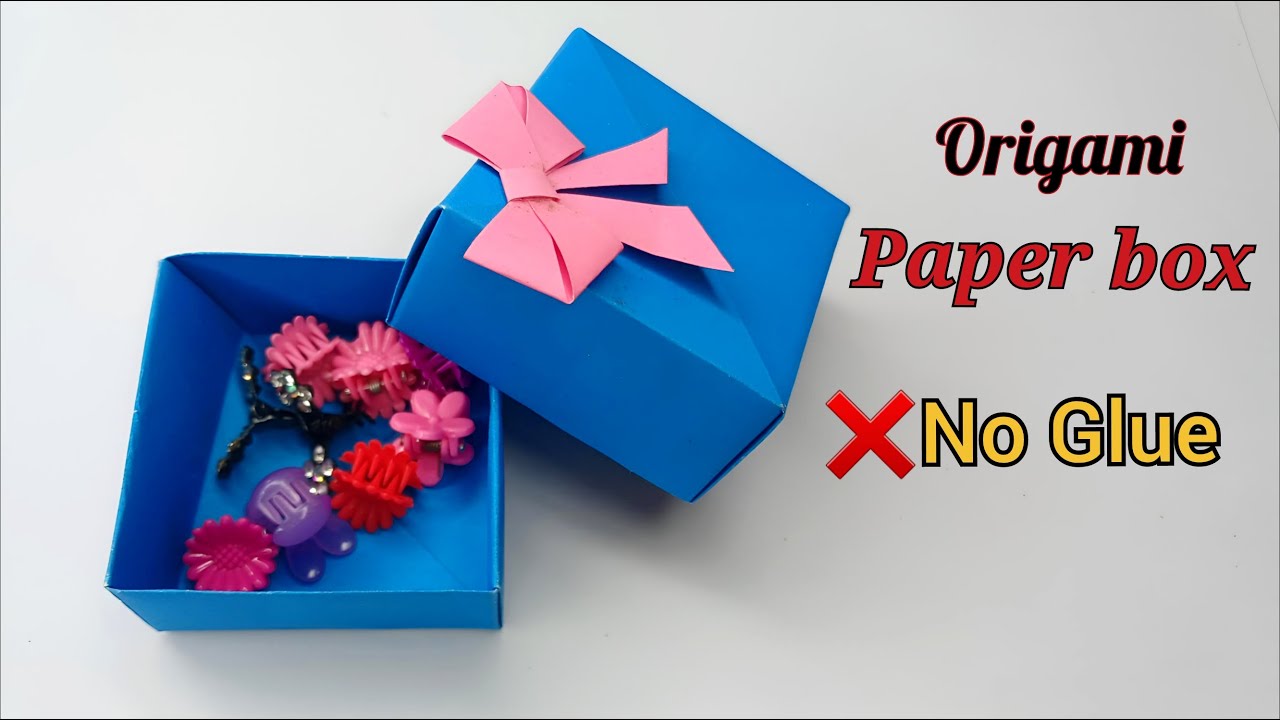
Have you ever wanted to add a personal touch to your gifts without spending a lot of money? Making a paper gift box is easier than you think, and it can turn any present into something truly special.
Imagine the surprise on your loved one’s face when they see a beautifully crafted box made just for them. In this guide, you’ll discover simple steps to create your own paper gift box, using materials you already have at home.
Ready to impress with your creativity? Let’s get started!
Materials Needed
Gathering the right materials is key before you start making a paper gift box. The quality and type of materials you choose affect both the look and durability of your box. Let’s take a closer look at what you’ll need to create a beautiful and sturdy paper gift box.
Types Of Paper
The paper you pick sets the foundation for your gift box. Cardstock is a popular choice because it’s thick and holds its shape well. You can also use patterned scrapbook paper for a decorative touch or plain kraft paper for a rustic look.
Have you thought about using recycled paper? It’s eco-friendly and can add a unique texture. Avoid very thin paper like regular printer sheets—they won’t support the structure of your box.
Essential Tools
- Scissors or craft knife:For clean, precise cuts.
- Ruler:To measure and make straight lines.
- Pencil:For marking your measurements before cutting.
- Glue or double-sided tape:To hold the box together securely.
- Bone folder or a blunt edge:To create crisp folds without tearing the paper.
Using the right tools makes the process smoother and your finished box more professional. Do you prefer tape or glue? Each has its advantages depending on your paper type and design.
Optional Decorations
Adding decorations lets your gift box stand out and reflect your personal style. You might use ribbons, stickers, or washi tape to enhance its appearance. Small embellishments like buttons or dried flowers can add a charming touch.
Think about the recipient’s preferences—will they appreciate a minimalist design or something more vibrant? These extras don’t just decorate; they can also reinforce the box structure in some cases.

Credit: www.youtube.com
Choosing The Right Paper
Choosing the right paper is key to making a beautiful paper gift box. The paper affects how the box looks and feels. It also impacts how easy it is to fold and hold its shape. Picking paper with the right qualities helps create a neat and sturdy gift box.
Consider the paper’s weight, texture, color, and environmental impact. Each factor shapes the final result of your project. Take time to choose paper that matches your style and the gift you want to wrap.
Weight And Texture
Paper weight is the thickness and heaviness of the sheet. Thicker paper holds shapes better and supports heavier gifts. Thin paper is easier to fold but can tear or bend.
Texture means how the paper feels. Smooth paper looks clean and sharp. Textured paper adds a unique touch and makes your box stand out. Match the texture to the gift and occasion.
Color And Patterns
Color sets the mood of your gift box. Bright colors bring energy and fun. Soft colors feel calm and elegant. Choose colors that suit the receiver’s taste.
Patterns add personality and style. Stripes, polka dots, or florals can make the box more eye-catching. Use patterns that match the event, like hearts for Valentine’s Day or stars for birthdays.
Eco-friendly Options
Eco-friendly paper helps reduce waste and pollution. Recycled paper saves trees and uses less energy. Look for papers labeled as recycled or made from sustainable sources.
Biodegradable papers break down naturally after use. They are safe for the environment. Using eco-friendly paper shows care for the planet and the person receiving the gift.
Basic Folding Techniques
Mastering basic folding techniques is essential to making a neat and sturdy paper gift box. These skills ensure your box holds its shape and looks professional. Even if you’re new to paper crafts, focusing on simple folds can make a big difference in your final product.
Creasing Tips
Sharp creases create strong edges that help your box maintain its form. Use a bone folder or the back of a butter knife to press down each fold firmly. If you don’t have special tools, running your fingernail along the fold also works well.
Try creasing on a flat, hard surface to avoid wrinkles. You might think folding gently is enough, but a strong crease makes unfolding and refolding easier, preventing your paper from tearing. Have you noticed how your box feels sturdier when the folds are crisp?
Folding Accuracy
Accurate folds are the foundation of a well-made box. Align edges carefully before folding; even a small misalignment can throw off the entire shape. Using a ruler to guide your folds can help keep everything straight.
Take your time with each fold instead of rushing. I once rushed through folding a gift box, and the misaligned edges made the lid impossible to close properly. You want your folds to be precise enough that your box pieces fit together like a puzzle.
Common Folds
Some folds appear repeatedly in paper gift box making. The valley fold, where you fold the paper inward, and the mountain fold, folding the paper outward, are the most frequent. Master these two to handle most box designs.
- Valley fold:Creates an inward crease, like a “V” shape when viewed from the side.
- Mountain fold:Creates an outward crease, resembling an upside-down “V.”
- Squash fold:Used to flatten a corner or edge, giving structure to box flaps.
Practicing these folds will boost your confidence and improve the look of your paper gift boxes. Have you tried mixing these folds to create unique shapes or lids?

Credit: www.youtube.com
Step-by-step Box Assembly
Assembling your paper gift box can feel like piecing together a small puzzle. Each fold and crease shapes the final look and strength of the box. Paying close attention to every step ensures your gift arrives in style and stays secure.
Creating The Base
Start by folding the paper along the pre-scored lines to form the box’s foundation. Make sharp creases using a bone folder or the edge of a ruler to keep edges clean and sturdy. Folding inward helps the base hold its shape and supports the weight of your gift.
Double-check the corners as you fold; they need to line up perfectly for a neat finish. If the paper feels flimsy, consider adding a second layer to strengthen the base. Have you ever noticed how a solid base makes the whole box feel more professional?
Making The Lid
The lid should fit snugly but not too tight. Fold along the crease lines just like the base, but keep in mind the lid needs to be slightly larger to slide over the bottom. You can test-fit it as you go to avoid frustration later.
Adding a slight flare on the sides can make it easier to open. If you want a decorative touch, try cutting a small notch or adding a ribbon tab here. What design would make your gift box stand out on the shelf?
Securing Edges
Use glue or double-sided tape to hold the flaps together securely. Place adhesive carefully to avoid lumps or messiness, which can spoil the box’s appearance. Press edges firmly and hold for a few seconds to ensure a strong bond.
For extra durability, reinforce the inside corners with small strips of paper or washi tape. This step can prevent the box from collapsing under heavier gifts. Have you ever had a box fall apart just before gift-giving? Taking a moment here saves that trouble.
Adding Decorative Elements
Adding decorative elements transforms a simple paper gift box into a charming, personalized treasure. It’s where your creativity shines and where the gift starts to feel truly special. Small touches can make a big impact and show the recipient you put thought into every detail.
Ribbons And Bows
Ribbons and bows are classic choices that instantly add elegance and color to your paper gift box. You can choose from satin, grosgrain, or even rustic twine to match the occasion or the style of your gift.
Try wrapping the ribbon around the box multiple times for a layered look. Or tie a large, fluffy bow on top to create a focal point. Have you experimented with different ribbon textures or widths? Sometimes a simple knot can look just as stunning as a perfect bow.
Stickers And Stamps
Stickers and stamps offer an easy way to add personality without much effort. Use themed stickers that match the gift or the event—like floral designs for spring or stars for a birthday.
Stamps let you create custom patterns or messages directly on the box. You can even mix and match colors to create a unique effect. What message or image would make your gift box stand out?
Personalized Tags
Personalized tags give your gift box a heartfelt touch that feels customized just for the recipient. You can write their name, a short message, or a meaningful quote on a small card attached with string or ribbon.
Try using different shapes or materials for tags—like kraft paper for a rustic feel or glossy cardstock for something sleek. Adding a handwritten note on the tag makes the gift even more memorable. What personal touch could you add that the recipient will remember?

Credit: www.youtube.com
Troubleshooting Common Issues
Making a paper gift box can be rewarding, but certain challenges might pop up along the way. Troubleshooting these common issues will save you time and frustration, ensuring your box looks neat and holds together well. Let’s dive into some practical tips to help you perfect your craft.
Preventing Tears
Tears often happen where the paper is weakest—usually along folds or edges. To avoid this, use paper that’s thick enough to handle folding but still flexible. Thin or cheap paper tears easily, so investing in a good quality cardstock can make a huge difference.
Another trick is to score the fold lines before folding. You can do this by gently running a blunt tool, like the back of a butter knife, along a ruler placed on the fold line. This weakens the paper fibers just enough to fold cleanly without ripping.
If you notice small tears starting to form, reinforce those areas with a bit of clear tape on the inside before proceeding. Would you rather fix a tear or prevent it altogether?
Fixing Uneven Folds
Uneven folds can make your box look lopsided and affect its ability to close properly. Check that your paper is perfectly square or rectangular before you start folding—this is crucial. Measuring twice and cutting once really applies here.
Use a ruler or straight edge to guide your folds, pressing firmly along the fold line. If a fold is off, try to gently unfold and reshape it instead of forcing the paper, which can cause wrinkles or tears.
Sometimes, slight unevenness is due to the paper shifting while you fold. To fix this, hold the edges steady with one hand as you crease the fold with the other. Have you noticed how much steadiness affects your folding precision?
Improving Box Stability
A flimsy box can ruin the presentation of your gift. Stability starts with choosing the right paper—thicker cardstock provides better support. If your box feels too soft, try doubling the paper or adding a thin cardboard layer inside.
Pay close attention to the tabs you use to hold the box together. Secure them well with glue or double-sided tape, making sure they’re aligned perfectly. Loose tabs are a common reason for wobbly boxes.
You can also reinforce the corners by adding small pieces of tape on the inside joints. This extra step can prevent the box from collapsing under weight. How sturdy do you want your box to be for the gift inside?
Creative Variations
Creative variations make paper gift boxes unique and personal. They allow you to tailor the box to fit the occasion or the recipient’s style. Experimenting with shapes, layers, and materials adds charm and functionality. These ideas keep the crafting process fun and inspiring.
Different Box Shapes
Changing the shape gives your box a fresh look. Try squares, rectangles, or triangles instead of plain cubes. Hexagons and circles make elegant containers. Shapes influence how you fold and decorate the box. Custom shapes can match the gift theme, like a heart for Valentine’s Day.
Layered Designs
Layering adds depth and interest to your paper gift box. Use multiple layers of paper to create a sturdy box. Each layer can have different colors or patterns. Layered lids or bases make the box feel special. You can also add cut-out layers for a peek-through effect.
Mixed Materials
Combine paper with other materials for a richer look. Use ribbons, fabric, or lace to decorate the box edges. Add buttons, beads, or stickers for texture. Cardstock mixed with vellum or transparent paper creates elegance. Mixed materials make the box stand out and feel more valuable.
Tips For Gift Presentation
Presenting your paper gift box beautifully can elevate the entire gifting experience. Paying attention to the details shows care and makes your gift memorable. Here are some practical tips to help you present your paper gift box in the best way possible.
Choosing The Right Gift Size
Your gift box should fit the gift snugly without being too tight or too loose. A box that is too big can make the gift look lost, while one that’s too small might damage the contents or be difficult to close.
Think about the shape and dimensions of your gift carefully. If you’re unsure, choose a slightly larger box and use tissue paper or filler to keep the gift secure and add a polished look.
Wrapping Techniques
Simple folds and clean edges go a long way in making your paper gift box look professional. Use double-sided tape to hide any sticky spots and avoid bulky tape lines on the outside.
Try wrapping the box with patterned paper or plain kraft paper, then add a contrasting ribbon or twine. You can also use a small strip of washi tape to create a neat border around the edges of the box.
Adding Final Touches
Small details can make your gift box stand out. Attach a handmade tag with the recipient’s name or a short message for a personal touch.
Consider adding natural elements like a sprig of dried flowers, a cinnamon stick, or a small pine cone to the ribbon for a unique look. These final touches show thoughtfulness and make your gift feel special.
Frequently Asked Questions
What Materials Do I Need To Make A Paper Gift Box?
You need sturdy paper or cardstock, scissors, ruler, pencil, glue, and decorative items. These materials ensure your box is strong and attractive for gifting.
How Do You Fold A Paper Gift Box Properly?
Start by scoring fold lines with a ruler and pencil. Fold carefully along scored lines for clean edges. This method ensures a neat and durable box.
Can I Customize The Size Of My Paper Gift Box?
Yes, adjust the paper dimensions before cutting to create any box size. Custom sizing allows you to fit various gift types perfectly.
What Is The Best Type Of Paper For Gift Boxes?
Cardstock or thick craft paper is ideal. It holds shape well and supports decoration, making your gift box sturdy and visually appealing.
Conclusion
Making a paper gift box is simple and fun. You only need paper, scissors, and glue. Follow each step with care to get a neat box. Personalize it with colors or patterns you like. This craft adds a special touch to any gift.
Try making different sizes for various presents. Enjoy the process and share your creation with others. A handmade gift box shows thought and effort. Keep practicing to improve your folding skills. Making paper boxes brings joy to both giver and receiver.

Similar Posts































