How to Draw Christmas Gifts: Easy Steps for Festive Art Fun
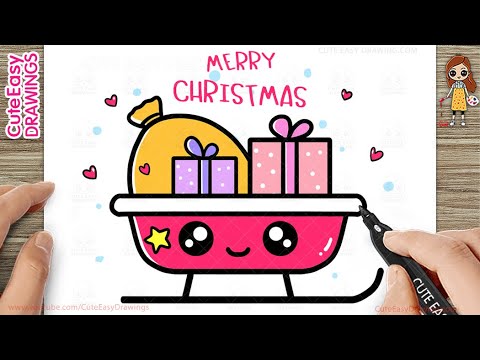
Are you ready to create charming Christmas gift drawings that will wow your friends and family? Whether you want to decorate holiday cards, wrap presents with a personal touch, or simply enjoy a fun festive activity, learning how to draw Christmas gifts is easier than you think.
In this guide, you’ll discover simple steps to bring your holiday art to life, even if you’ve never picked up a pencil before. Keep reading, and soon you’ll be surprising everyone with your own beautiful gift illustrations!
Materials Needed
Drawing Christmas gifts requires a few basic materials. These tools help create clear and colorful drawings. Using the right materials makes your artwork neat and fun.
Gather all your supplies before starting. This saves time and keeps your workspace organized. Here are the essential materials needed for drawing Christmas gifts.
Paper
Choose smooth, thick paper for best results. Drawing paper or sketch pads work well. Avoid thin paper that tears easily or lets colors bleed.
Pencils
Use pencils for sketching outlines. A standard HB pencil is perfect. Keep a sharpener handy for fine details.
Eraser
Have a clean eraser to fix mistakes. A soft rubber eraser works best without damaging paper.
Colored Pencils Or Markers
Use colored pencils or markers to add color. Choose bright colors like red, green, gold, and blue. Markers give bold colors; pencils allow shading.
Ruler
A ruler helps draw straight lines for gift boxes. It makes your drawing look neat and tidy.
Optional: Glitter Or Stickers
For extra sparkle, use glitter or Christmas-themed stickers. These add a festive touch to your drawing.

Credit: www.vexels.com
Basic Shapes For Gift Boxes
Starting your drawing of Christmas gifts becomes much simpler when you understand the basic shapes that make up gift boxes. These shapes form the foundation of your artwork and help you keep proportions right. Once you master these, adding details like ribbons and patterns becomes effortless.
Understanding The Cube Shape
The most common shape for a gift box is the cube. Think of it as a simple 3D square with equal sides. Drawing a cube helps you capture the classic gift box look instantly.
Try sketching a cube by drawing a square first. Then add another square slightly offset behind it and connect the corners with straight lines. This creates the illusion of depth and volume.
Using Rectangular Prisms For Different Box Sizes
Not all gift boxes are perfect cubes. Many come in rectangular shapes, longer or taller than a cube. Drawing a rectangular prism lets you show these variations easily.
Start with a rectangle instead of a square and repeat the same steps as with the cube. This shape works well for gifts like books or shoe boxes. Experiment with different lengths and heights to match your idea.
Adding Simple Circles For Round Gift Boxes
Some gifts come in round boxes, like tins or specialty packaging. Incorporating circles into your drawing can help you represent these shapes well.
Begin with an oval or circle for the top view and add curved lines down to suggest the sides. This breaks the monotony of straight edges and adds variety to your gift illustrations.
Combining Shapes For Complex Gift Boxes
Sometimes gifts have lids or layers, which means combining shapes is necessary. You can stack a smaller cube on top of a bigger one or place a rectangle above a square.
This approach gives your drawing more dimension and makes your gift look more realistic. Think about how the box opens and add shapes accordingly to show that.
Have you noticed how focusing on just a few basic shapes makes drawing gifts less intimidating? What shapes do you find easiest to start with when sketching? Your next gift drawing will feel more natural once you build confidence with these simple forms.
Adding Details To Boxes
Adding details to your Christmas gift drawings brings them to life and makes each box unique. Details like ribbons, bows, and patterns can turn a simple shape into a festive masterpiece. You’ll find that focusing on these small touches helps you capture the holiday spirit in your artwork.
Ribbons And Bows
Ribbons and bows give your gift boxes a sense of dimension and texture. Start by drawing simple curved lines around the box to represent the ribbon wrapping it. Then, add a bow on top by sketching loops and tails, paying attention to how the ribbon folds and overlaps.
Think about how the light hits the ribbon. Adding slight shading or highlights can make the bow appear more realistic. Have you noticed how a neatly tied bow instantly makes a gift look more special? You can achieve that effect in your drawing with just a few strokes.
Patterns And Textures
Patterns and textures add personality to your gift boxes. You can use stripes, polka dots, stars, or even festive icons like snowflakes to decorate the wrapping paper. Keep the pattern consistent and evenly spaced to maintain a clean look.
Try mixing different textures, like a shiny metallic effect or a matte finish, by varying your shading technique. Have you ever seen a gift wrapped in velvet or burlap? Suggesting such textures in your drawing can make your art stand out.

Credit: www.freepik.com
Drawing Different Gift Sizes
Drawing Christmas gifts of various sizes makes your artwork lively and balanced. Different sizes add depth and interest to the scene. Each size gives a unique feel and style. Understanding how to draw small, medium, and large gifts helps you create a festive and appealing image.
Small Gifts
Small gifts are great for filling spaces and adding detail. Start with a simple square or rectangle. Keep the lines neat and the proportions balanced. Use smaller bows and ribbons to match the size. Small gifts can sit beside larger ones or be scattered around.
Medium Gifts
Medium gifts often serve as the main focus. Draw these with clear edges and a good shape. You can add more detail, like patterned wrapping paper or layered ribbons. These gifts should look sturdy and well-wrapped. Place medium gifts near the center to draw attention.
Large Gifts
Large gifts create a strong base and catch the eye first. Use bold shapes and thick lines. Big bows and wide ribbons look best here. You can add shadows or highlights to show volume. Large gifts often go at the bottom or back of your drawing to support smaller ones.
Creating A Festive Scene
Creating a festive scene around your Christmas gifts makes your drawing come alive. It sets a joyful mood that instantly connects with the holiday spirit. Think beyond just the gifts themselves—consider the whole environment to make your artwork feel warm and inviting.
Arranging Gifts
Start by grouping your gifts thoughtfully. Place larger boxes at the back and smaller ones in front to create depth. Vary the shapes and sizes to avoid a flat look and keep the arrangement interesting.
Think about how you want the viewer’s eye to move across the scene. Maybe position a brightly wrapped gift slightly off-center to grab attention. Don’t be afraid to overlap some presents; it adds a natural, cozy feel.
Have you tried stacking a few gifts at odd angles? It can break the symmetry and make your drawing feel more dynamic. Adding small details like ribbons, tags, or bows can also enhance the festive vibe.
Adding Background Elements
Background details bring context and mood to your festive scene. Simple additions like a softly glowing string of lights, a decorated Christmas tree, or a fireplace can set the holiday tone immediately.
Consider the space around your gifts. You might sketch a cozy rug underneath or scatter a few pinecones or holly leaves nearby for natural texture. These small touches make your scene richer without overwhelming the main focus.
Ask yourself: what’s the story behind your scene? Is it a quiet morning by the tree or a lively gathering spot? Let your background elements reflect that feeling and invite your viewers to step into your holiday moment.
Coloring Tips For A Vibrant Look
Coloring your Christmas gift drawings can bring them to life in a way that feels joyful and festive. The right colors make your artwork pop and create a sense of warmth that matches the holiday spirit. With a few simple tips, you can turn a plain sketch into a vibrant masterpiece that captures attention and spreads cheer.
Choosing Color Schemes
Start by picking a color scheme that reflects the holiday mood. Traditional reds, greens, and golds create a classic Christmas feel, but don’t hesitate to try blues, silvers, or even pastel tones for a unique twist.
Think about the emotion you want your gift to convey. A bright red bow suggests excitement, while soft green wrapping feels calm and cozy. Ask yourself which colors make you smile and use those as your base.
Try limiting your palette to three or four colors to keep the design balanced. Too many colors can overwhelm the drawing and distract from the gift’s details.
Using Shades And Highlights
Adding shades and highlights gives your drawing depth and a more three-dimensional look. Use a slightly darker shade of your main color to add shadows where the light would naturally be blocked.
Highlights can be created by leaving small areas white or using a lighter color on spots where light would hit directly. This contrast makes the wrapping paper and ribbons look shiny and textured.
Experiment with layering colors gently instead of pressing hard, which helps you blend shades smoothly. Have you noticed how a little shadow under a ribbon can make it appear tied tightly? That’s the effect you want to achieve.
Personalizing Your Art
Personalizing your Christmas gift drawings makes them special and unique. It brings warmth and thoughtfulness to your art. Small details can create a big impact. Personal touches connect your drawing to the person receiving it.
Adding Names Or Tags
Including names or gift tags adds a personal feel to your drawing. Use clear, simple fonts or handwriting styles. Place the name on a tag tied to the gift or written directly on the wrapping paper. Experiment with colors that match the gift’s theme. This small touch shows care and attention.
Incorporating Personal Touches
Draw elements that reflect the receiver’s personality or interests. Add favorite colors, patterns, or symbols. Include small drawings like hearts, stars, or snowflakes. Use textures to show different wrapping materials, like shiny ribbons or soft paper. These details make your art feel warm and thoughtful.
Troubleshooting Common Mistakes
Drawing Christmas gifts can be fun, but it’s easy to run into a few common problems that might make your drawing look less polished. Recognizing these mistakes early can save you time and help your artwork shine. Let’s look at some typical issues and how you can fix them.
Proportion Issues
Are your gift boxes looking too wide or too tall? Proportion mistakes often happen when the sides of the box don’t match up properly. A gift that looks too stretched can lose its three-dimensional feel.
Try sketching light guidelines to mark the edges and corners before adding details. This helps keep everything balanced. If your bows or ribbons look oversized compared to the box, adjust their size until they feel right to your eye.
Think about the perspective you want. Is the gift drawn from above, straight on, or at an angle? Changing your viewpoint can help avoid awkward proportions and give your drawing more depth.
Color Mismatches
Choosing the wrong colors can make your Christmas gifts look dull or confusing. Sometimes colors clash or don’t match the festive vibe you want to create.
Use a limited color palette to keep things simple. Stick to classic Christmas colors like reds, greens, golds, and whites, but don’t be afraid to add a splash of something unexpected—like a deep blue or silver—to make your drawing pop.
Check your colors under different lights if you’re working with physical materials. Colors can look very different indoors versus outside. Digital artists can use color adjustment tools to find the perfect shade.
- Ask yourself: Does this color fit the mood?
- Would this ribbon color stand out against the box?
- Is the gift wrapping consistent across all your drawings?
Correcting these common mistakes will make your Christmas gift drawings look more professional and festive. Keep practicing, and soon you’ll spot these issues before they happen!

Credit: pngtree.com
Frequently Asked Questions
How Do I Start Drawing Christmas Gifts?
Begin with basic shapes like rectangles and squares for gift boxes. Add ribbons and bows next for detail. Use light pencil strokes first to adjust proportions easily.
What Materials Are Best For Drawing Christmas Gifts?
Use pencils for sketching and colored markers or pencils for vibrant colors. Quality paper helps colors blend smoothly. Erasers are essential for corrections.
How Can I Make Christmas Gifts Look Realistic?
Add shadows and highlights to create depth. Use varied line thickness for texture. Observe real gifts for accurate details and color combinations.
What Are Easy Christmas Gift Drawing Ideas For Beginners?
Start with simple box shapes and basic bows. Draw gifts with festive patterns like stripes or polka dots. Keep designs minimal and focus on neat lines.
Conclusion
Drawing Christmas gifts can be fun and simple. Just follow the steps carefully and practice often. Use basic shapes to build your drawings. Add colors to make your gifts look lively. Remember, mistakes are part of learning. Keep trying, and your skills will improve.
Share your drawings with friends and family. Enjoy the festive spirit through your art. Drawing gifts brings joy and creativity together. Start today and see how much you can create!

Similar Posts































