How to Gift Wrap a Big Box: Expert Tips & Tricks
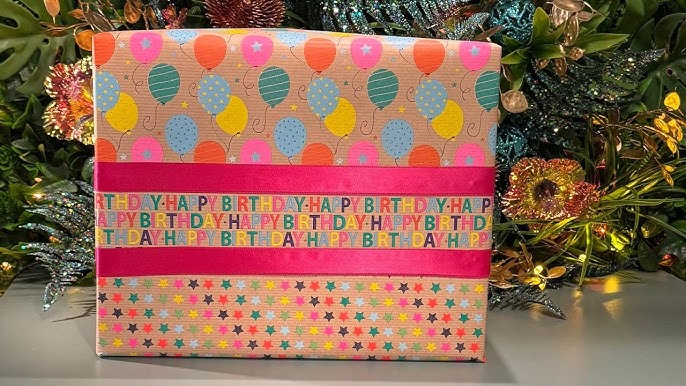
You’ve got the perfect big gift, but wrapping that large box feels like a challenge. Maybe you worry about messy edges, torn paper, or a gift that just doesn’t look special.
What if you could wrap your big box neatly and beautifully, making your gift stand out instantly? In this guide, you’ll learn simple, step-by-step tips to wrap any big box with confidence and style. Keep reading, and you’ll discover how easy it is to create a stunning gift presentation that will wow anyone who receives it.
Choosing The Right Materials
Choosing the right materials can make a huge difference when wrapping a big box. The right supplies not only make the process smoother but also give your gift a polished, professional look. Let’s break down what you’ll need to get started and how to pick each item wisely.
Selecting Wrapping Paper
Choose wrapping paper that is thick enough to handle large surfaces without tearing easily. Thin paper can rip during folding or taping, which creates extra work and frustration. Look for rolls labeled as “premium” or “heavyweight” for durability.
Consider the design and color to match the occasion and the recipient’s taste. Matte finishes tend to be easier to work with because they don’t slip as much when folding. Have you ever tried glossy paper that just won’t stay put? It can be tricky on bigger boxes.
Picking The Best Tape
Strong tape is essential for securing large boxes. Clear packing tape or double-sided tape works best because it holds firmly without showing too much. Avoid thin or decorative tapes that might peel off quickly.
If you’ve struggled with tape that loses stickiness or tears the paper, try wider tape—about 2 inches wide. It covers more surface and reduces the number of strips you need, saving time and frustration.
Using Ribbons And Bows
Ribbons and bows add a finishing touch that makes your gift stand out. For large boxes, choose wider ribbons (1 to 2 inches) so they don’t get lost on the surface. Satin or grosgrain ribbons hold their shape well and look elegant.
Don’t forget to anchor your ribbons securely under the box or with extra tape to prevent slipping. Have you ever had a bow fall off just before presenting a gift? It’s an easy problem to avoid with proper securing.
Think about layering different ribbon textures or adding a large, eye-catching bow to balance the size of your box. Your gift will look thoughtfully wrapped, not just covered.

Credit: food52.com
Preparing The Box
Preparing the box is an important step for neat and smooth gift wrapping. A well-prepared box helps the wrapping paper stay flat and prevents tears. Taking time to get the box ready creates a professional look and makes wrapping easier. Focus on trimming and securing the box before covering it with paper.
Trimming Excess Edges
Check the box for any loose or extra edges. These edges can make wrapping uneven and cause lumps. Use scissors or a box cutter to carefully trim away any flaps or parts sticking out. Trim small bits at a time to avoid cutting too much. Clean edges help the paper lay flat and smooth.
Securing Loose Parts
Boxes sometimes have loose corners or flaps. These can shift and spoil the wrapping job. Use clear tape to firmly secure any parts that move or open. Press the tape well to keep it hidden under the wrapping paper. A stable box shape prevents wrinkles and torn paper while wrapping.
Measuring And Cutting Paper
Measuring and cutting paper correctly is the foundation of wrapping a big box neatly. Too little paper and you won’t cover the gift fully; too much paper and you’ll end up with bulky, uneven folds. Getting this step right makes the whole process smoother and your gift look professional.
Calculating Paper Size
Start by placing the box on your wrapping paper. Imagine wrapping the box like a present—think about how much paper you’ll need to cover all sides plus some overlap.
Measure the box’s height, width, and length. Add these measurements together like this:
- Length + Width + Extra 4-6 inches for overlap
- Height x 2 + Extra 2-3 inches for folding
This ensures the paper wraps around completely with enough to fold neatly over the edges. Don’t guess; use a ruler or tape measure for accuracy.
Cutting Clean Edges
Once you have the right paper size marked, it’s time to cut. Clean edges make your gift look tidy and professional, so avoid tearing or rough cuts.
Use sharp scissors or a craft knife on a flat surface. If you want, draw a straight line with a pencil and a ruler before cutting to keep edges straight.
Remember, uneven edges can make the paper bunch up or tear when folding. Taking a bit more time here makes a big difference in your final presentation.

Credit: www.facebook.com
Wrapping Techniques For Large Boxes
Wrapping a large box can seem tricky but simple techniques make it easier. The key is neat folds and smooth tape application. These steps help keep the paper tight and the box looking clean. Follow these tips for a polished finish on big gifts.
Folding Corners Neatly
Start by cutting enough paper to cover the box fully. Leave extra on all sides to fold over. Bring the paper over the box edges and press gently to crease. For corners, fold the paper like wrapping a present. Create sharp, angled folds to avoid bulk. Tuck in excess paper at the corners for a flat look. Use your fingers to smooth the folds and keep them tight. This technique stops wrinkles and keeps the paper close to the box.
Taping Without Wrinkles
Use clear tape for a clean look. Start by taping the middle section first to hold paper in place. Press tape firmly to avoid air bubbles. Work from the center outwards to keep the paper smooth. Add tape along edges and corners to secure folds. Avoid pulling tape too hard, which can wrinkle the paper. If a wrinkle appears, lift the tape gently and smooth the paper before reapplying. This approach keeps the wrapping neat and tidy.
Adding Decorative Touches
Adding decorative touches to a big gift box can transform it from simple to stunning. These final details show thoughtfulness and make your gift truly stand out. Small changes can make a big impact and reflect your personal style.
Creative Ribbon Styles
Ribbons are more than just a way to hold wrapping paper together—they’re a chance to get creative. Try looping wide satin ribbons into bold bows or weaving thinner ribbons for texture. Mix different colors or patterns to match the occasion or the recipient’s personality.
Have you ever tried curling ribbon with scissors? It’s a quick trick that adds fun spirals to your package. Or consider layering several ribbons for a rich, textured look that invites a closer glance.
Using Gift Tags
A gift tag isn’t just a label; it’s part of the decoration. Choose tags in interesting shapes like stars or hearts to add charm. Handwriting a personal message makes the gift feel even more special and unique.
Think about attaching the tag with a small clothespin or tying it with twine for a rustic vibe. You can even add a small photo or drawing on the tag to surprise the recipient. What message would make your loved one smile before they even open the gift?
Incorporating Natural Elements
Natural touches bring warmth and a bit of the outdoors to your gift wrap. Sprigs of pine, fresh herbs, or dried flowers add a lovely scent and visual interest. These elements are easy to attach with ribbon or glue dots.
Try using a small pinecone or a cinnamon stick for a seasonal feel. If you’re giving a gift in the spring or summer, a fresh flower can brighten the package beautifully. Adding natural items shows you took extra care and attention.

Credit: www.instagram.com
Handling Difficult Shapes And Textures
Wrapping a big box can be challenging, especially when the shape isn’t a perfect cube or the paper feels too fragile for the task. Handling difficult shapes and textures requires a bit of creativity and patience. You’ll find that adjusting your approach can save time and make the gift look fantastic without frustration.
Wrapping Irregular Boxes
Irregular boxes don’t have neat edges or flat surfaces, so standard wrapping techniques might not work. Instead, try using tissue paper or lightweight wrapping paper first to cover the box loosely. This creates a smooth base before you add your main wrapping paper.
Cut the paper larger than usual to give yourself extra room to fold and tuck around odd corners. Use double-sided tape to secure folds discreetly and avoid bulky tape lines that ruin the look. Don’t hesitate to cut small slits in the paper at tricky spots to help it lay flat without tearing.
Have you ever tried folding the paper like an accordion on one side to accommodate bulges? This technique adds flexibility and keeps the wrap tight. Remember, your goal is to make the shape appear neat, even if it’s not perfectly covered.
Working With Delicate Paper
Delicate wrapping paper adds elegance but tears easily, especially on large boxes with sharp edges. To protect the paper, wrap the box with tissue paper first or use a paper stabilizer like lightweight fabric or a thin plastic sheet underneath.
Use minimal tape and opt for glue dots or double-sided tape for a cleaner look and less risk of ripping. Press gently when folding and avoid dragging the paper across rough surfaces. If you notice wrinkles forming, smooth them out with your hands instead of trying to reposition the paper harshly.
Have you considered using a ribbon or band to secure the paper instead of relying solely on tape? It provides extra support and enhances the presentation. Sometimes, less is more with delicate materials—you can focus on simple, elegant folds rather than complex wrapping patterns.
Troubleshooting Common Issues
Wrapping a big box can feel overwhelming, especially when unexpected issues pop up. Tears, wrinkles, and visible tape can turn your carefully chosen paper into a messy sight. Don’t let these common challenges ruin your gift presentation—simple fixes can save the day and make your package look neat and polished.
Fixing Tears And Wrinkles
Tears happen more often than you think, especially when the paper is thin or you’re rushing. If you spot a small tear, place a piece of clear tape on the inside of the paper to hold it together discreetly. This prevents the tear from getting bigger while keeping the outside smooth.
Wrinkles usually form when the paper isn’t tight enough around the box. Try gently smoothing the paper with your hands, starting from the center and moving outward. If wrinkles persist, add a bit more tape to secure the paper tightly, but avoid over-taping, which can cause new creases.
Preventing Tape Visibility
Visible tape can distract from your gift’s polished look. To hide tape, use thin, matte tape instead of glossy clear tape. Matte tape blends better with wrapping paper and is less noticeable in photos or under lights.
Another trick is to place tape under folds or edges rather than on flat surfaces. This way, the tape stays out of sight but still holds firmly. Have you noticed how some professional gift wrappers seem to make tape disappear? They use these subtle placement techniques.
Frequently Asked Questions
How Do You Measure Wrapping Paper For A Big Box?
Measure the box’s length, width, and height. Add extra paper for overlap and folding. This ensures full coverage and a neat finish when wrapping.
What Type Of Tape Works Best For Big Box Wrapping?
Use double-sided tape or strong clear tape. These hold the paper firmly and are less visible. Avoid weak tape that may tear or slip.
How Can I Avoid Wrinkles On Large Wrapped Boxes?
Smooth the paper gently as you wrap. Work from the center outwards, and keep the paper taut. Wrinkle-free wrapping looks clean and professional.
What’s The Easiest Folding Technique For Big Box Corners?
Use the “hospital corner” fold for sharp edges. Fold one flap, then tuck and crease the other neatly. This method creates crisp, tidy corners.
Conclusion
Gift wrapping a big box can feel tricky but is quite simple. Start with the right tools and take your time. Fold edges neatly and secure the paper well. Adding a ribbon or bow gives a nice touch. Practice helps you wrap faster and better each time.
You can make any big gift look special and neat. Enjoy the process and make your gift stand out. Simple steps lead to great results every time. Give your gift with confidence and a smile.

Similar Posts































