
Looking for a special way to present your gift? Making your own gift box adds a personal touch that store-bought boxes just can’t match.
Imagine the smile on your loved one’s face when they see a beautifully crafted box made just for them. In this guide, you’ll discover simple steps to create a perfect box using materials you probably already have. Whether it’s for a birthday, anniversary, or just because, you’ll learn how to make your gift stand out right from the start.
Ready to impress with your creativity? Let’s get started!

Credit: www.youtube.com
Materials Needed
Gathering the right materials is the first step to making a perfect gift box. Simple tools and supplies can create a beautiful and sturdy box. Using quality materials helps your gift look special and well-presented.
Keep everything organized before starting. This saves time and reduces mistakes. Check that you have all items ready and in good condition.
Box Base Material
- Cardboard or thick craft paper
- Corrugated board for extra strength
- Decorative patterned paper for covering
Cutting Tools
- Sharp scissors for clean cuts
- Craft knife for detailed edges
- Cutting mat to protect surfaces
Adhesives
- Glue stick for paper attachment
- Double-sided tape for neat joins
- Hot glue gun for strong hold
Measuring Tools
- Ruler for precise measurements
- Pencil for marking lines
- Protractor for angled cuts
Decorative Elements
- Ribbons and bows
- Stickers and stamps
- Colored markers and pens
Choosing The Right Paper
Choosing the right paper can make or break your gift box project. The texture, weight, and size of the paper affect not only the box’s appearance but also its durability. Picking the perfect paper ensures your gift looks polished and holds up well during wrapping and handling.
Types Of Paper
There are many paper types you can use, each with its own strengths. Cardstock is thick and sturdy, perfect for boxes that need to hold heavier items. Wrapping paper is lighter and often decorative but may need reinforcement if the gift is bulky.
Other options include craft paper, which gives a natural, rustic look, and patterned scrapbook paper that adds a personal touch. You might want to try textured paper like linen or embossed varieties for an elegant finish. Have you thought about using recycled paper? It’s eco-friendly and often has a unique character.
Sizing Your Paper
Getting the size right is crucial to avoid waste and frustration. Your paper should be large enough to wrap around the box’s base and sides with some overlap for folding. Measure the length, width, and height of your gift carefully before cutting.
Try this: add twice the height of the box plus the length and width for the total paper size. For instance, if your box is 6 inches long, 4 inches wide, and 3 inches high, your paper should be about 6 + 4 + 3 + 3 inches wide and 6 + 3 + 3 inches long. Do you usually guess sizes and end up trimming too much? Measuring first saves time and paper.
Measuring And Cutting
Measuring and cutting are the foundation of making a perfect gift box. Accurate measurements ensure your box fits the gift snugly, while clean cuts keep the box looking professional. Skipping attention here can lead to frustrating adjustments later, so take your time and be precise.
Marking Dimensions
Start by deciding the size of your box based on the gift’s dimensions. Measure the length, width, and height carefully, then add extra space for the box flaps. You can use a ruler or measuring tape and a pencil to mark these dimensions on your cardboard or paper.
Mark clearly with light, straight lines to avoid confusion during cutting. Double-check each measurement before moving on. Have you ever rushed this step and ended up with a box too small or too large? Taking a moment here saves a lot of hassle.
Cutting Techniques
Use a sharp craft knife or scissors for cutting, depending on the material you chose. A craft knife gives cleaner edges on thicker materials like cardboard, while scissors work well on thinner paper.
- Cut slowly along your marked lines to maintain accuracy.
- Use a cutting mat to protect your surface and keep cuts straight.
- Apply steady pressure to avoid jagged edges or tearing.
Try to keep your hand steady by resting your wrist on the table. Have you noticed how a shaky hand can ruin your cuts? Practicing a few test cuts on scrap paper can build your confidence before you tackle the actual box pieces.
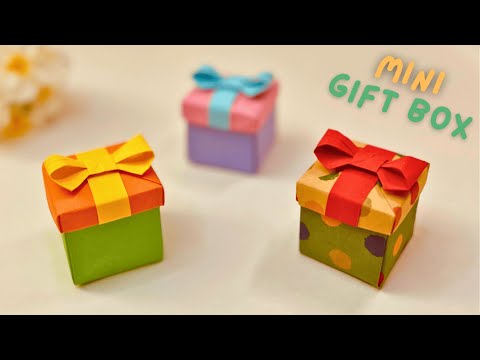
Credit: www.youtube.com
Folding The Box
Folding the box is where your flat piece of paper or cardboard starts turning into a three-dimensional gift container. The precision of your folds determines how sturdy and neat the final box looks. Paying attention to each crease and fold will make your gift stand out even before it’s opened.
Creating Creases
Start by folding along the edges where your box’s sides will be. Use a ruler or the edge of a credit card to press down firmly and create sharp creases. This helps the box hold its shape better and prevents it from collapsing when you fill it.
Try folding and unfolding the paper a couple of times to soften it—this makes the next steps easier. Have you noticed how much smoother your folds become with this simple trick?
Forming The Base
Once the creases are in place, fold the sides up to form the base of your box. Pinch the corners carefully so the edges meet neatly without gaps. If your paper is thick, you might find it easier to fold the corners inward before folding up the sides.
Test the base’s sturdiness by pressing gently on the bottom. If it feels loose, reinforce the corners with a small piece of tape or glue. A solid base means your gift stays safe during handling.
Shaping The Lid
The lid should fit snugly but not too tight to avoid tearing when you open it. Use the same crease technique to fold the lid’s edges, but add a small extra margin—about 2 millimeters—to allow some wiggle room. This tiny adjustment makes a big difference in usability.
Fold the corners of the lid similarly to the base, but be sure not to crease too sharply, or the lid might crack. Have you ever struggled with a lid that just won’t fit? This simple extra step prevents that frustration.
Assembling The Box
Assembling the box is a key step in creating a neat gift container. It shapes the box and gives it strength. Careful assembly ensures the box holds its form and looks good.
Securing The Sides
Start by folding the sides along the creases. This creates the box shape. Use glue or double-sided tape on the tabs. Press the sides firmly to stick them well. Hold for a few seconds to secure. Check that the edges line up evenly. This helps the box look tidy and stable.
Reinforcing Corners
Corners bear the most stress in a box. Strengthen them by adding small strips of tape inside. Use clear tape for a clean look. Press the tape firmly along each corner. Another option is to fold extra cardboard pieces and glue them inside corners. This adds extra support and keeps the box rigid. Reinforced corners help the box last longer and hold heavier gifts.
Decorating The Box
Decorating your gift box is where creativity truly shines. It transforms a simple container into a special part of the gift itself. Small touches can make a big impact, and you don’t need to be an expert to make your box look stunning.
Adding Ribbons And Bows
Ribbons and bows add an instant touch of elegance and charm to any gift box. Choose a ribbon that matches or contrasts nicely with your wrapping paper to create visual interest.
Try different ribbon styles, like satin for a smooth shine or burlap for a rustic feel. Wrap the ribbon tightly around the box and secure it with a neat bow. If you want to get creative, layer multiple ribbons of varying widths and textures.
Have you ever noticed how a simple bow can make the whole package feel more thoughtful? It’s a small detail that often gets the most compliments.
Using Stickers And Labels
Stickers and labels are an easy way to personalize your gift box. You can find stickers in all shapes and themes, from floral designs to fun holiday motifs.
Try adding a custom label with the recipient’s name or a short message. This makes the gift feel more personal and shows you took extra care. You might even create your own label on your computer and print it out for a professional look.
Think about the story your stickers and labels tell. Are they playful, elegant, or quirky? Matching the style to the recipient’s personality can make your gift stand out even more.
Tips For Customization
Customizing a gift box makes it more special and memorable. Simple changes can show thoughtfulness and care. Use colors, themes, and small details to create a unique presentation. Personal touches make your gift stand out and bring joy to the receiver.
Personalizing With Colors
Choose colors that match the recipient’s favorite shades or the occasion. Bright colors create excitement. Soft tones give a calm and elegant feel. Use colored paper, ribbons, or markers to add these shades. A mix of two or three colors often looks balanced and attractive.
- Pick colors that reflect the recipient’s personality.
- Use contrasting colors to highlight details.
- Match colors to the season or holiday.
Incorporating Themes
Select a theme that fits the gift or the person. Themes add a story to the box. It could be nature, vintage, or a favorite hobby. Use stickers, drawings, or printed images to support the theme. Layer different materials like fabric or paper to create texture.
- Choose simple themes for a clean look.
- Use small decorations to keep it neat.
- Match the box design to the gift inside.

Credit: www.youtube.com
Frequently Asked Questions
What Materials Do I Need To Make A Gift Box?
To make a gift box, you need sturdy paper or cardboard, scissors, ruler, pencil, glue, and decorative items. These materials ensure your box is strong and visually appealing for gifting.
How Do I Measure Paper For A Gift Box?
Measure the gift’s dimensions first. Add extra for the box’s sides and flaps. Use a ruler for accuracy. Precise measurements help the box fit perfectly.
What Folding Techniques Create A Sturdy Gift Box?
Use crisp, clean folds along scored lines. Fold edges inward to form sharp corners. Reinforce with glue for strength. Proper folding keeps the box durable and neat.
Can I Customize The Gift Box Design?
Yes, customize with paint, stickers, ribbons, or patterned paper. Personal touches make the box unique and special. Custom designs enhance the gift’s presentation.
Conclusion
Making a gift box is simple and fun. You only need a few tools and materials. Follow the steps carefully, and you will create a nice box. Personalize it with colors or decorations to make it special. This homemade box adds a thoughtful touch to any gift.
Try making different sizes for various presents. Enjoy the process and share your creations with friends. Crafting your own box shows care and effort. A small gift, wrapped in a handmade box, feels more meaningful. Give it a try today!