How to Make a Ribbon Bow for Gift Box: Master the Art
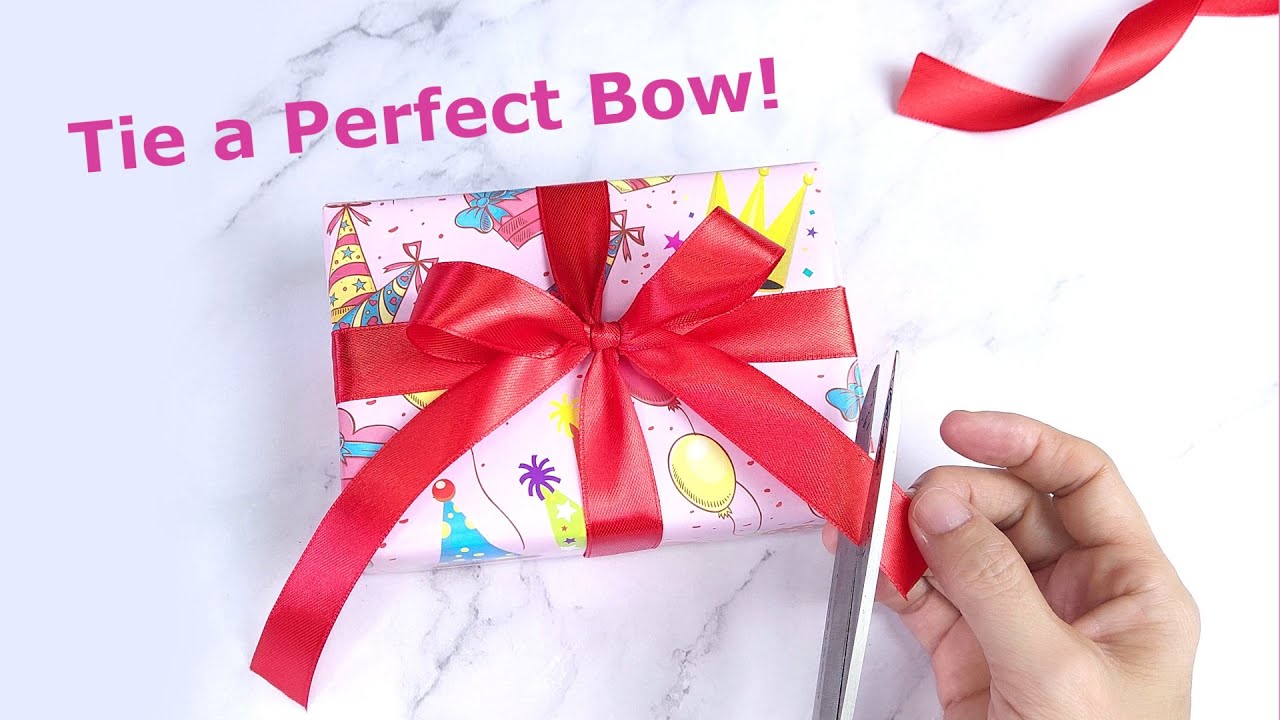
Want to make your gift box stand out and feel extra special? Learning how to make a ribbon bow is easier than you think, and it adds a beautiful, personal touch that anyone will appreciate.
Imagine the smile on your loved one’s face when they see a perfectly tied bow on their gift. In this guide, you’ll discover simple steps to create a stunning ribbon bow that looks professional but takes just minutes to make.
Ready to impress with your wrapping skills? Let’s get started!
Credit: www.youtube.com
Choosing The Right Ribbon
Choosing the right ribbon can make all the difference in how your gift box looks. The ribbon sets the tone and adds a personal touch that can turn a simple present into something special. It’s not just about picking a pretty color; the material and width play a big role in the final appearance and ease of tying your bow.
Types Of Ribbon Materials
Not all ribbons are created equal. Some are stiff and hold shape well, while others are soft and flowy. Think about what kind of bow you want before choosing:
- Satin:Smooth and shiny, satin ribbons give a classic and elegant look. They’re great if you want a bow that feels luxurious.
- Grosgrain:This ribbon has a ribbed texture, offering more grip. It holds bow shapes nicely and adds a casual charm.
- Organza:Sheer and delicate, organza ribbons add a light, airy feel. They work well for softer, romantic styles.
- Velvet:Thick and plush, velvet ribbons create a rich, warm look. Perfect for holiday gifts or special occasions.
Try feeling different ribbons in your hands before buying. You might find that the texture inspires a particular style of bow.
Selecting The Perfect Width And Color
The width of your ribbon affects how bold or subtle your bow appears. Narrow ribbons suit small boxes and delicate bows, while wider ribbons make big, dramatic statements.
Color choice can highlight the occasion or your personal style. Are you aiming for festive, elegant, or playful?
- For a minimalist look, choose neutral shades like white, cream, or beige.
- Bright colors grab attention and add fun energy to your gift.
- Metallic tones like gold and silver bring a festive sparkle.
Think about the wrapping paper too. Does the ribbon complement or contrast? Sometimes a contrasting ribbon makes the gift pop, but matching tones can feel more cohesive.

Credit: www.youtube.com
Tools Needed For Ribbon Bow
Making a beautiful ribbon bow requires a few simple tools. Having the right items makes the process smooth and fun. Gather these tools before starting your gift wrapping project.
Essential Tools
- Ribbon – Choose a ribbon that suits your gift size and color theme.
- Scissors – Sharp scissors cut the ribbon cleanly without fraying.
- Measuring tape or ruler – Measures the ribbon length accurately.
- Double-sided tape or glue – Holds the bow securely in place.
- Wire or twist ties – Helps in shaping and tying the bow neatly.
Optional Accessories
- Decorative beads or small ornaments – Adds sparkle and charm to the bow.
- Hot glue gun – Provides stronger adhesion for heavier ribbons or decorations.
- Pliers – Useful for twisting wire tightly and shaping the bow.
- Ribbon spool holder – Keeps ribbon organized and prevents tangling.
- Fray check liquid – Stops ribbon edges from fraying over time.
Basic Ribbon Bow Techniques
Mastering basic ribbon bow techniques can transform a simple gift box into a stunning present. These skills are easy to learn and make your packaging look polished and thoughtful. Let’s dive into two essential techniques that anyone can try at home.
Creating Simple Loops
Start by cutting a length of ribbon about 24 inches long. Hold the ribbon in your hand and fold it back and forth to create even loops. The number of loops depends on how full you want your bow to look—three to five loops usually work well.
Pinch the center tightly to keep the loops in place. Wrap a small piece of ribbon or floral wire around the center to secure it. Fluff the loops by gently pulling and shaping them, creating a balanced and airy bow.
Try different ribbon widths and textures to see how the loops change the bow’s style. Have you noticed how satin ribbon gives a smooth finish, while grosgrain adds texture? Experimenting with these can make your gift unique.
Tying A Classic Bow
This technique is the one you’ve likely seen on shoe laces or hair ribbons, but it’s perfect for gift boxes too. Start by wrapping the ribbon around your box and crossing the ends on top.
Make two loops, one with each end, then tie them together like shoelaces. Pull the loops tight to create a neat bow. Adjust the size of the loops and tails so the bow looks symmetrical.
Don’t worry if the bow looks a little uneven at first—you can always reshape the loops and trim the ends. Have you ever noticed how a slight angle on the ribbon ends gives a more polished look? Try cutting the ends diagonally or in a “V” shape to add a professional touch.

Credit: food52.com
Advanced Bow Styles
Advanced bow styles can truly elevate your gift wrapping game. They add depth, texture, and a touch of elegance that simple bows often lack. Trying these techniques will challenge your skills and impress anyone who receives your gift.
Layered Ribbon Bows
Layered ribbon bows use multiple ribbons of different widths and colors stacked together. Start by cutting several strips, with the widest at the bottom and the narrowest on top.
Create loops with each ribbon, stacking them carefully as you go. Secure the center tightly with a thin wire or string to hold all layers firmly.
Play with contrasting colors or textures like satin and sheer to make your bow pop. Have you ever noticed how a layered bow instantly makes a gift look more thoughtful and professional?
Floral Ribbon Bows
Floral ribbon bows mimic the shape of a flower, perfect for adding a natural touch to your package. Use a long piece of ribbon and twist it into petal-like loops, pinching the base as you go.
Arrange these loops in a circular pattern and fasten them at the center. Adding a small embellishment like a pearl or button can create a stunning focal point.
This style invites creativity — consider mixing different ribbon colors to imitate the look of real flower petals. What colors would you combine to match your gift’s theme or recipient’s favorite flower?
Step-by-step Bow Making Process
Creating a beautiful ribbon bow can transform a simple gift box into a memorable present. The process is straightforward and enjoyable once you understand the key steps. Let’s break down the essential actions to help you craft a perfect bow every time.
Measuring And Cutting Ribbon
Start by choosing the right length of ribbon. Too short, and your bow will look small; too long, and it can become bulky. A good rule is to measure about 24 to 30 inches for a medium-sized bow, but adjust based on your box size.
Cut the ribbon with sharp scissors to avoid frayed edges. If you want a cleaner finish, try cutting the ends at an angle or in a V shape. This small detail makes your bow look polished and professional.
Forming Loops And Tails
Hold the ribbon in the middle and create the first loop by folding one side back toward the center. Repeat with the other side to form symmetrical loops. The loops are the heart of your bow, so make sure they are even and fluffy.
Next, create the tails by letting the ribbon ends hang down. You can trim the tails to your desired length or shape them with a diagonal cut. Play around with the loops and tails until you’re happy with the balance and fullness.
Securing The Bow
To keep your bow intact, use a small piece of wire, string, or even a twist tie to cinch the center tightly. This step is crucial because it holds all the loops and tails together firmly. If you want extra security, add a dab of hot glue where the loops meet.
Once secured, fluff the loops again and adjust the tails. This final step allows you to perfect the bow’s shape and ensure it looks inviting on your gift box. Have you ever noticed how a well-tied bow can make you smile before even opening the gift?
Attaching The Bow To Gift Boxes
Attaching the bow to your gift box is a crucial step that can either highlight your wrapping skills or make the whole effort look sloppy. How you secure the bow affects both the presentation and the ease of unwrapping. You want the bow to stay put, but not so permanently that it damages the wrapping paper or makes it hard for the recipient to enjoy the gift.
Using Tape Or Glue
Tape is the simplest way to attach a bow, especially if you’re short on time. Use double-sided tape to keep it hidden and neat. Place a small piece under the center of the bow and press it firmly onto the box.
If you prefer a stronger hold, a dab of hot glue works well. Just be careful not to use too much, as it can seep through and ruin the wrapping paper. Test the glue on a scrap piece of ribbon first to see how fast it dries and how strong it holds.
Have you ever struggled with a bow that kept sliding off? Tape or glue can solve this problem, but consider how easy you want it to be for the recipient to remove the bow.
Tying Directly Around The Box
Another option is to tie the bow directly around the gift box. This method adds a natural, secure feel and eliminates the need for adhesives. Wrap the ribbon around the box and tie your bow on top, adjusting the loops and tails to look just right.
This approach works best with thicker ribbons that hold shape well. Thin ribbons might slip or come undone if not tied tightly. You can also add a second ribbon underneath for extra security and style.
Have you tried tying the bow this way? It can make your gift look more polished and gives your recipient the joy of untying the bow themselves, adding to the unwrapping experience.
Tips For Perfecting Your Bow
Perfecting a ribbon bow takes a bit of care and attention. Small adjustments can make your gift box look truly special. Focus on keeping the ribbon neat and the bow balanced. These tips help you create a bow that looks tidy and beautiful every time.
Maintaining Ribbon Shape
Use ribbons that hold their form well, such as wired ribbons. Avoid ribbons that easily wrinkle or crease. Gently shape the loops with your fingers to keep them smooth. Store ribbons rolled to prevent bends and kinks. Handle the ribbon lightly to avoid crushing it.
Adjusting Bow Size And Symmetry
Match the bow size to the gift box size for a balanced look. Make sure each loop is even in length to create symmetry. Pinch the bow center tightly to hold the shape. Step back and check the bow from different angles. Trim ribbon ends evenly for a polished finish.
Creative Bow Variations
Creative bow variations bring a fresh look to simple gift wrapping. They add charm and personality to any present. Experimenting with different styles makes your gift stand out. Small changes can create big impacts.
Adding Embellishments
Embellishments make ribbon bows more eye-catching. Try attaching small decorations like beads or buttons. Tiny flowers or glitter can add sparkle. Use glue or thread to secure these items firmly. Keep embellishments light to avoid weighing down the bow. These details give your gift a special touch.
Mixing Ribbon Textures
Combining various ribbon textures creates depth and interest. Pair smooth satin with rough burlap for contrast. Mix sheer organza with velvet for softness. Layer ribbons of different widths for a fuller look. Tie them together tightly to hold shape. Texture mixing helps your bow look unique and stylish.
Frequently Asked Questions
How Do You Start Making A Ribbon Bow?
Begin by cutting a ribbon strip. Fold it into loops, holding the center tightly. Secure with wire or thread.
What Type Of Ribbon Is Best For Gift Bows?
Satin or grosgrain ribbons work best. They hold shape well and add a polished look.
How Can I Make A Bow Stay On A Gift Box?
Use double-sided tape or hot glue. Attach the bow firmly to prevent slipping.
Can I Reuse Ribbon Bows For Other Gifts?
Yes, carefully untie or cut the securing wire. Store bows flat to maintain shape.
Conclusion
Making a ribbon bow for a gift box is simple and fun. Practice a few times to get the perfect shape. Use the right ribbon and scissors for clean cuts. Add your bow to any gift to make it look special.
Small details like this show you care. Try different colors and styles for variety. Your gifts will stand out with a neat, handmade bow. Enjoy the process and share your beautiful creations.

Similar Posts































