How to Make Paper Gift Boxes: A Crafty DIY Guide
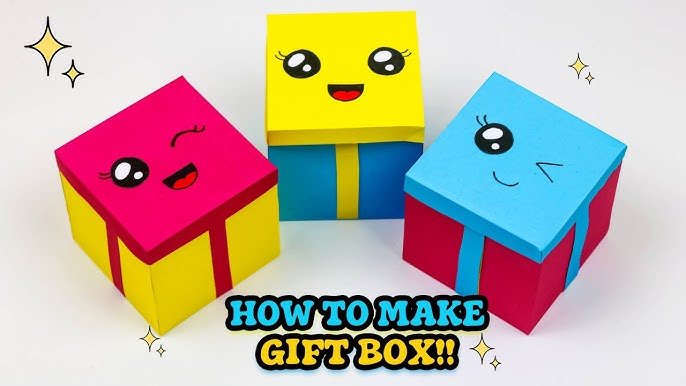
Looking for a creative way to add a personal touch to your gifts? Making paper gift boxes is easier than you think, and it can turn any present into something truly special.
Imagine giving a gift wrapped in a box you made yourself—unique, charming, and full of your own style. In this guide, you’ll learn simple steps to craft beautiful paper gift boxes that will impress your friends and family. Ready to transform your gift-giving?
Let’s dive in and make your presents stand out!
Materials Needed
Making paper gift boxes requires a few simple materials. Gathering the right supplies helps create neat and sturdy boxes. The materials you choose affect the box’s look and strength.
Types Of Paper
Choose paper based on the box’s purpose and design. Cardstock is thick and strong, perfect for durable boxes. Decorative paper adds style and color. Wrapping paper, scrapbook paper, and kraft paper work well too. Avoid thin paper that tears easily.
Cutting Tools
Sharp cutting tools make clean edges. Use scissors for simple shapes and small cuts. A craft knife gives precise cuts for detailed designs. A cutting mat protects surfaces and helps measure. Rulers and bone folders assist with straight lines and folds.
Adhesives And Decorations
Adhesives hold the box together firmly. Glue sticks are easy and less messy. Liquid glue works well for strong bonds but needs drying time. Double-sided tape is quick and clean. Decorations add charm—stickers, ribbons, washi tape, or stamps personalize your box.

Credit: www.youtube.com
Basic Folding Techniques
Basic folding techniques are key to making neat paper gift boxes. These skills help shape the paper perfectly. They ensure the box stays sturdy and looks professional. Learning to fold well saves time and avoids frustration. Focus on making clean creases and sharp edges. These simple steps improve the final result.
Creasing And Scoring
Creasing means making a line on the paper where it folds. Scoring is the process of lightly cutting or pressing to guide the fold. Both help the paper bend easily without cracking. Use a bone folder or the back of a butter knife for creasing. Score the fold lines on the backside of the paper. This prevents damage and creates smooth folds. Take your time to mark each line clearly before folding.
Folding Tips For Clean Edges
Clean edges make the box look neat and sharp. Fold slowly and press firmly along the creases. Use a ruler or straight edge to guide the fold. Always fold toward the scored line to keep it precise. Avoid rushing to prevent wrinkles or uneven edges. Pinch the corners well for a crisp finish. Small adjustments improve the box’s overall appearance.
Step-by-step Box Assembly
Assembling a paper gift box requires patience and attention to detail. Each fold and cut shapes the final look. The process breaks down into simple tasks anyone can follow. Precise measuring and cutting ensure the box fits perfectly. Folding the base creates a sturdy bottom. Crafting the lid completes the box with a neat finish.
Measuring And Cutting Paper
Start with a clean, flat sheet of paper. Use a ruler to measure the dimensions carefully. Mark the measurements lightly with a pencil. Include extra space for folding flaps. Cut the paper along the marked lines using sharp scissors. Clean edges make the box look professional. Keep the cuts straight and precise for easy folding.
Folding The Base
Fold along the lines marked for the base. Make sharp creases by pressing firmly with a bone folder or fingernail. Fold the side flaps inward to create the box walls. Secure the flaps by applying glue or double-sided tape. Hold the edges together until the glue dries. The base should feel firm and stable to support contents.
Creating The Lid
Measure and cut paper slightly larger than the base. This allows the lid to fit over the box easily. Fold the edges inward like the base, forming walls. Use glue or tape to fix the flaps. Press firmly to avoid gaps or loose edges. The lid should slide on smoothly without being too tight or loose.

Credit: www.youtube.com
Design Variations
Design variations in paper gift boxes allow you to tailor your creation to perfectly suit the occasion and the recipient’s style. Small changes in shape and added features can transform a simple box into a memorable gift holder. Understanding these options helps you make boxes that stand out, whether for birthdays, holidays, or special events.
Square And Rectangular Boxes
Square and rectangular boxes are classic shapes that fit many gift types. They are easy to fold and assemble, making them ideal if you want a quick yet neat result.
You can play with dimensions to create shallow boxes for jewelry or taller ones for bottles or candles. Using patterned paper or solid colors can emphasize the shape’s clean lines.
Think about the gift inside—would a wider box show it off better? Or would a taller box add an element of surprise when opened? These questions guide your design choices.
Decorative Flaps And Handles
Adding decorative flaps and handles turns a simple box into a charming package. Flaps can be cut in unique shapes like scallops or waves, giving your box a creative edge.
Handles not only make carrying easier but also add a personalized touch. You can use ribbon, twine, or paper strips as handles, matching them to the box’s color scheme.
Have you tried folding the flaps into origami shapes? It’s a fun way to add texture and interest without extra materials. These small details often make the biggest impression on the person receiving your gift.
Personalizing Your Boxes
Personalizing your paper gift boxes transforms a simple container into a memorable keepsake. It shows thoughtfulness and adds a unique touch that store-bought boxes can’t match. You can tailor your designs to fit the occasion or the personality of the person receiving the gift.
Painting And Drawing
Using paints or markers lets you add vibrant colors and detailed designs to your boxes. You might try simple patterns like polka dots or stripes, or go for intricate illustrations if you feel confident. Even a child’s doodles can turn a plain box into something special and heartfelt.
Think about using stencils to keep your shapes neat. Experiment with metallic or glitter paint to make your box shine. Have you considered drawing a meaningful quote or the recipient’s name to make it truly one-of-a-kind?
Adding Ribbons And Stickers
Ribbons instantly elevate the look of your gift box. Tie a satin or grosgrain ribbon around the box for a classic, elegant feel. You can also curl thin ribbons to add a playful touch.
Stickers offer endless possibilities for decoration. Choose themed stickers that match the occasion, like hearts for Valentine’s Day or stars for a birthday. Layering stickers with ribbons creates texture and interest that catches the eye.
Try mixing different colors and textures to see what feels right. What combination would surprise and delight the person receiving your gift?

Credit: www.youtube.com
Troubleshooting Common Issues
Creating paper gift boxes can be a fun and rewarding craft, but sometimes things don’t go as planned. You might notice uneven edges or weak corners that make your box look less polished or sturdy. These common issues can be easily fixed with a few simple tricks, so don’t let small problems stop your creativity.
Fixing Uneven Edges
Uneven edges often happen when the paper isn’t cut straight or the folds aren’t crisp enough. To fix this, use a metal ruler and a sharp craft knife for precise cutting instead of scissors. This gives you cleaner edges that fit together better.
If you already have uneven edges, try trimming them gently with a craft knife to even out the length. Another tip is to use a bone folder or the back of a spoon to press down folds firmly; this helps the edges align neatly when you assemble the box.
Have you noticed your edges sticking out or not lining up? Check if your folds are perfectly square. Slight misalignments can cause a domino effect, so folding carefully can prevent many issues upfront.
Strengthening Weak Corners
Weak corners make your gift box look fragile and can cause it to fall apart when handled. Reinforce these spots by adding a small piece of double-sided tape or glue on the inside corners before folding. This extra support holds the shape firmly.
Another way to strengthen corners is to use thicker paper or cardstock, especially if your box needs to hold heavier items. If you’re set on thinner paper, consider layering with an extra piece inside the corner for durability.
Have you ever had your box corners pop open? Applying a little pressure while the glue dries can help the adhesive bond stronger. A quick tip is to hold the corner in place with clips or clothespins until fully dry.
Creative Uses For Paper Gift Boxes
Paper gift boxes are more than simple containers. They offer many creative uses beyond gifts. These boxes bring charm and function to everyday life. Their lightweight and customizable nature makes them perfect for many tasks. Explore how to use paper gift boxes in fresh, practical ways.
Gift Packaging Ideas
Use paper gift boxes to make presents look special. Decorate boxes with ribbons, stickers, or drawings. Create themed boxes for birthdays or holidays. Layer tissue paper inside for a neat reveal. Add a small card or note for a personal touch. Use different sizes to fit various gifts. Wrap boxes in colorful paper for a bright effect. Stack small boxes to form a gift tower. Reuse boxes to reduce waste and save money.
Storage And Organization
Paper gift boxes help keep small items tidy. Use them to organize office supplies like pens and clips. Store craft materials such as beads and buttons safely. Sort jewelry by type or color in separate boxes. Keep chargers and cables neat and untangled. Label boxes for quick item finding. Stack boxes to save space on shelves. Use clear or decorated boxes for easy identification. Paper boxes offer a cheap and stylish storage solution.
Frequently Asked Questions
What Materials Do I Need For Paper Gift Boxes?
You need sturdy paper or cardstock, scissors, glue, ruler, pencil, and decorative items. These basics ensure a strong and attractive box.
How Do I Fold Paper Gift Boxes Correctly?
Measure and score fold lines carefully. Fold along the lines sharply to create clean edges. Use glue to secure flaps.
Can I Customize Paper Gift Boxes Easily?
Yes, customize with colors, patterns, ribbons, or stickers. Personal touches make your gift box unique and special.
What Size Paper Is Best For Gift Boxes?
Use paper large enough to fit your gift with extra space for folding. Standard sizes like A4 or letter work well.
Conclusion
Making paper gift boxes is simple and fun. You only need a few materials and some patience. Each box you create adds a personal touch to your gifts. Practice helps you improve your folding and cutting skills. These boxes can suit any occasion or gift size.
Try different colors and patterns to make them special. Crafting your own boxes saves money and shows care. Enjoy the process and share your creations with friends. Keep experimenting and have fun with every new box.

Similar Posts































