How to Make the Gift Box: Creative Ideas Unwrapped
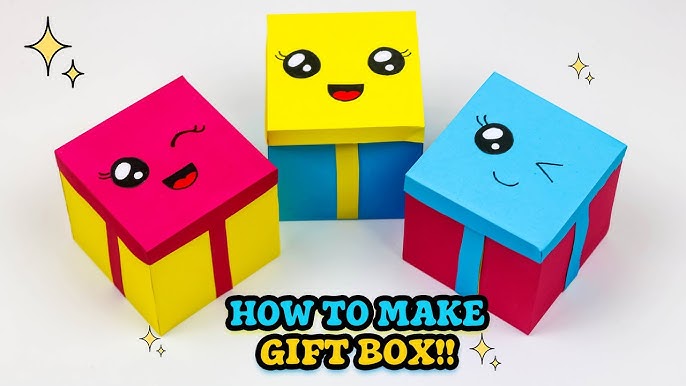
Are you looking for a simple way to impress someone with a personalized touch? Making your own gift box is easier than you think, and it adds a special charm to any present.
Imagine the look on their face when they receive a gift wrapped in a box you crafted yourself. In this guide, you’ll discover step-by-step instructions to create a beautiful gift box that shows you care. Ready to turn an ordinary gift into something unforgettable?
Keep reading, and you’ll learn exactly how to do it.

Credit: www.youtube.com
Choosing The Right Materials
Choosing the right materials is key to making a beautiful and sturdy gift box. The materials affect the box’s look, feel, and strength. Picking good paper and tools helps create a neat, professional result. Consider the purpose of the box and the style you want. This makes the process smoother and more enjoyable.
Paper Types And Textures
Paper choice changes the box’s appearance and durability. Cardstock is thick and strong, perfect for a firm box. Decorative paper adds color and patterns for style. Textured papers, like linen or embossed, give a fancy touch. Smooth paper works well for a clean, simple look.
- Cardstock: sturdy and easy to fold
- Wrapping paper: colorful and stylish
- Textured paper: adds luxury feel
- Plain paper: simple and neat
Eco-friendly Options
Eco-friendly materials help protect the environment. Recycled paper uses less energy and reduces waste. Kraft paper is natural and biodegradable. Bamboo paper grows fast and is sustainable. Using eco-friendly options shows care for nature and makes your gift special.
- Recycled paper: good for the planet
- Kraft paper: natural brown and strong
- Bamboo paper: sustainable and soft
- Seed paper: plantable and unique
Tools You’ll Need
Good tools make folding and cutting easier. A sharp craft knife or scissors helps cut clean lines. A ruler keeps edges straight. A bone folder or similar tool makes sharp creases. Glue or double-sided tape holds the box firmly together.
- Craft knife or scissors
- Ruler or straight edge
- Bone folder or scoring tool
- Glue or double-sided tape
Basic Box Construction
Building a basic gift box involves a few simple steps. Understanding these will help you create a neat and sturdy box. The process starts with measuring and cutting the material precisely. Then, folding techniques shape the box. Finally, securing the box keeps everything in place. Each step is important for a professional look.
Measuring And Cutting
Start with a square or rectangular piece of paper or cardboard. Measure the size based on the gift. Add extra space for the sides and flaps. Use a ruler and pencil for accuracy. Cut along the marked lines carefully. Clean cuts make folding easier and neater.
Folding Techniques
Fold the paper along the scored lines to create edges. Score the paper lightly before folding to avoid cracks. Use a bone folder or the edge of a ruler. Fold all sides inward to form the box shape. Make sharp creases for a clean finish. Check that all corners meet properly.
Securing The Box
Use glue or double-sided tape to hold the flaps. Apply a small amount to avoid mess. Press firmly to ensure strong adhesion. Hold the edges together until dry. For extra strength, use corner reinforcements or small staples. The box should feel solid and not fall apart easily.
Creative Decorating Ideas
Creative decorating ideas bring life to simple gift boxes. They turn plain packages into memorable gifts. Decorating allows for personal touches that show thoughtfulness and care.
Using different techniques can make your gift box stand out. Choose styles that match the occasion or the receiver’s taste. Simple tools and materials can create beautiful effects.
Painting And Stamping
Painting adds color and personality to your gift box. Use acrylic paints or watercolors for bright, lasting designs. Simple patterns like dots, stripes, or hearts work well.
Stamping creates neat and repeatable patterns. Use rubber stamps with ink pads in matching colors. Try floral or geometric stamps for a stylish look.
Adding Ribbons And Bows
Ribbons and bows add texture and charm to any box. Choose satin, grosgrain, or lace ribbons in fun colors. Wrap ribbons around the box and tie a bow on top.
Layer different ribbon widths for a fuller, more elegant effect. You can also curl ribbon ends with scissors for a playful touch.
Using Natural Elements
Natural elements give your gift box an organic, rustic feel. Attach small pine cones, dried flowers, or twigs with glue or twine. Fresh herbs like rosemary add a nice scent too.
Combine natural pieces with simple paper tags for a warm, handmade look. These elements make your gift box unique and eco-friendly.

Credit: www.youtube.com
Personalizing Your Gift Box
Personalizing your gift box makes it truly special and thoughtful. It shows the recipient you put time and care into their present. Simple touches can turn a plain box into a cherished keepsake. Personal details create a lasting impression and make the gift stand out.
Small, creative ideas add personality and charm. Customizing your gift box is easy and fun. Use these ideas to make your gift unique and memorable.
Custom Labels And Tags
Custom labels and tags add a personal touch to your gift box. Use colorful paper or cardstock to create labels. Write the recipient’s name or a short message on each tag. Attach them with string or ribbon for a neat look.
Printable label templates save time and look professional. Choose fonts that match the occasion, like playful styles for birthdays or elegant ones for weddings. Add small drawings or stickers to make labels more lively.
Photo And Memory Inserts
Including photos or memory inserts makes your gift box meaningful. Print small pictures of special moments shared with the recipient. Place them inside the box or attach them to the lid.
Memory cards or notes with favorite quotes or inside jokes add warmth. Use colorful paper or decorative frames for these inserts. They remind the person of happy times and strengthen your bond.
Monograms And Hand Lettering
Monograms and hand lettering give a classy, handmade feel. Write the recipient’s initials on the box or on a tag. Use paint pens, markers, or calligraphy pens to create stylish letters.
Practice simple designs before writing on the box. Use stencils for neat shapes and consistent style. Hand lettering shows effort and adds an artistic touch to your gift.
Unique Box Shapes And Styles
Unique box shapes and styles make your gift stand out. They add charm and show extra care in presentation. Creating these boxes can be simple and fun. Explore different designs to find one that suits your gift perfectly.
Origami-inspired Designs
Origami designs use folding techniques without glue or tape. These boxes often have clean lines and elegant shapes. You can make them from colorful paper to match the gift theme. They are lightweight and easy to carry. Popular shapes include stars, flowers, and simple square boxes. Origami boxes offer a personal and artistic touch to your gift.
Magnetic Closure Boxes
Magnetic closure boxes use small magnets for easy opening and closing. This style looks sleek and modern. Magnets keep the box secure without ribbons or tapes. They are perfect for luxury gifts like jewelry or watches. You can buy magnetic sheets or strips from craft stores. Attach them inside the box flaps for a smooth closure. This style feels special and professional.
Drawer And Lid Variations
Drawer boxes slide open like a small chest. They add a surprise element to the gift. Lid variations include lift-off lids, hinged lids, and tuck-in flaps. Each lid type changes how the box opens and closes. Drawer boxes work well for layered or multiple items. Lift-off lids are simple and easy to make. Choose the style that best fits your gift size and shape.
Tips For Gift Box Presentation
Presenting your gift box thoughtfully can make all the difference in how your gift is received. Paying attention to the details shows care and effort, turning a simple gift into a memorable experience. Here are some practical tips to help your gift box look stunning and feel special.
Layering And Padding
Start by choosing soft padding like tissue paper, shredded paper, or fabric to protect your gift. Layering different textures adds depth and keeps fragile items safe.
Try placing the heaviest or largest item at the bottom and build up with smaller or lighter pieces. This not only looks balanced but also prevents damage during handling.
Think about color too—using contrasting or matching shades can make your gift pop right when the box is opened. Have you ever noticed how a burst of red tissue paper can instantly brighten a plain box?
Coordinating With Gift Themes
Match your box’s colors and patterns to the theme of your gift. If it’s a birthday gift for a child, use playful colors and fun prints.
For a spa-themed gift, soft pastels and natural textures like burlap or linen work beautifully. You want your box to hint at what’s inside without giving too much away.
Think about the recipient’s personality too. Would they appreciate classic elegance or quirky charm? Tailoring your presentation to them makes the gift feel more personal.
Finishing Touches
Add a final layer of polish with ribbons, bows, or custom tags. Don’t overdo it—sometimes a simple satin ribbon can speak louder than a bunch of decorations.
Try adding a small, unexpected item like a dried flower, a sprig of fresh herbs, or a handwritten note. These little extras show you went the extra mile.
Ask yourself: what would make opening this box even more joyful? That thought can guide you to the perfect finishing touch that ties everything together beautifully.

Credit: www.youtube.com
Frequently Asked Questions
What Materials Are Needed To Make A Gift Box?
You need cardstock or craft paper, scissors, glue, ruler, pencil, and decorative items. These basics help create sturdy, attractive boxes.
How Do I Fold A Gift Box Perfectly?
Score the paper along fold lines using a ruler and bone folder. Fold crisply for clean edges and a neat box shape.
Can I Customize The Gift Box Design?
Yes, personalize with colors, patterns, ribbons, stickers, or hand-drawn art. Customization makes your gift box unique and special.
How Long Does It Take To Make A Gift Box?
Typically, it takes 15 to 30 minutes depending on complexity. Practice speeds up your folding and decorating process.
Conclusion
Making a gift box is simple and fun. You only need a few materials and some patience. Follow the steps carefully, and you will create a beautiful box. Handmade boxes add a personal touch to any gift. They show thoughtfulness and care.
Try different colors and decorations to make each box unique. Practice makes perfect, so keep trying. Enjoy the process and share your creations with friends and family. Giving a gift in a handmade box feels special every time.

Similar Posts































