How to Tie a Bow Gift Box: Master the Art Effortlessly
Giving a gift feels special, but tying the perfect bow on your gift box can make it unforgettable. You want your present to look as thoughtful as the gift inside.
If you’ve ever struggled with ribbon slipping or uneven loops, you’re not alone. This guide will show you simple, step-by-step tips to tie a beautiful bow every time. By the end, you’ll have the confidence to add that extra touch that makes your gift stand out.
Ready to impress your loved ones with your wrapping skills? Let’s get started!

Credit: food52.com
Choosing The Right Ribbon
Choosing the right ribbon can completely change the look of your gift box. It’s not just about picking a pretty color; the ribbon’s type, size, and texture all play a role in how your bow will hold and how stunning your gift will appear. Have you ever struggled with a ribbon that just wouldn’t stay tied? Selecting the right one can save you from that frustration and make your gift stand out instantly.
Types Of Ribbons
Ribbons come in many forms, each suited for different styles and purposes. Satin ribbons are smooth and shiny, perfect for elegant and classic looks. Grosgrain ribbons have a ribbed texture and hold shapes well, making them ideal for structured bows.
Organza ribbons are sheer and lightweight, adding a delicate, airy touch to your gift. Velvet ribbons bring a plush, luxurious feel that works well for special occasions. Consider what atmosphere you want your gift to convey before selecting the type.
Matching Ribbon To Gift Size
The size of your gift box should influence your ribbon choice. A thin, narrow ribbon can get lost on a large box, while a wide ribbon might overwhelm a small package. Think about balance; the ribbon should enhance, not overpower, your gift.
For a small box, a ribbon about ¼ to ½ inch wide usually works best. Larger boxes benefit from ribbons that are 1 to 2 inches wide, allowing the bow to sit proportionately. Have you noticed how a well-sized ribbon makes the bow look more intentional and polished?
Color And Texture Tips
Color can set the mood for your gift, so choose wisely. Classic red or gold ribbons bring warmth and festivity, while pastel colors offer a soft, gentle vibe. Don’t hesitate to match or contrast the ribbon color with the wrapping paper to create visual interest.
Texture also adds depth—mixing a smooth satin ribbon with rough kraft paper creates an appealing contrast. Try pairing matte ribbons with shiny wrapping for a modern twist. How might changing the texture of your ribbon alter the feel of your gift?

Credit: food52.com
Preparing The Gift Box
Preparing the gift box is a crucial step before you tie a perfect bow. A well-prepared box sets the foundation for a clean, beautiful presentation that impresses every time. Taking the time to choose the right box and wrap it neatly can make your gift stand out instantly.
Selecting The Perfect Box
Choose a box that fits your gift snugly—too big, and the contents shift; too small, and the gift might get damaged. Think about the occasion and the recipient’s style. Matte finishes often look more elegant, while colorful or patterned boxes add a playful touch.
Have you noticed how a simple change in box texture can elevate your entire gift? Try rigid boxes for fragile items, or lightweight ones for soft gifts like clothing. Remember, the box should complement your bow, not compete with it.
Wrapping Techniques For A Neat Base
Start by cutting enough wrapping paper to cover the box fully with a little overlap. Smooth the paper over the box, keeping edges sharp and corners crisp. Use double-sided tape for a cleaner look without visible sticky strips.
Fold edges carefully to avoid wrinkles. If the paper tears, don’t panic—layer another strip neatly over the tear instead of rushing to fix it messily. This attention to detail makes your bow the star, resting perfectly on a smooth, flawless base.
Basic Bow Tying Steps
Tying a bow on a gift box adds a charming, personal touch. The process is simple and can make any present look special. Follow these basic bow tying steps to create neat, beautiful bows every time.
Measuring Ribbon Length
Cutting the right ribbon length ensures your bow looks full. Use a piece long enough to wrap around the box and form loops. A good rule is to measure about three times the box’s width. This gives enough ribbon for tying and shaping the bow.
Creating Loops
Make two loops by folding the ribbon back on itself. Hold the loops with your fingers, keeping them even in size. These loops form the classic bow shape. Adjust the loops until they look balanced and neat.
Securing The Knot
Pinch the center where the loops meet. Wrap the remaining ribbon around the center to hold the bow tight. Tie a firm knot or a simple twist under the bow. This keeps the loops from falling apart and holds the bow in place on the box.
Advanced Bow Styles
Advanced bow styles add a unique flair to your gift wrapping, making your presents stand out and feel extra special. These techniques go beyond the simple loop and knot, allowing you to experiment with shapes, layers, and textures. If you want your gift to truly catch the eye, mastering these styles can elevate your wrapping skills instantly.
Double Loop Bow
The Double Loop Bow creates a fuller, more elegant look by adding extra loops to a classic bow. Start by making two loops on each side instead of one, then tie them together as you would with a regular bow. This style works well with medium to wide ribbons and adds volume that makes the gift feel more luxurious.
Try using a wired ribbon for better shape control. You’ll notice how the loops hold their form and look professionally done. Have you ever thought how just a few extra loops can change the entire presentation?
Floral Bow
The Floral Bow mimics the appearance of a flower, adding a soft and romantic touch to your gift. To create this, make several small loops in a circular pattern, stacking them on top of each other. Secure the center tightly and fluff the loops to resemble petals.
This style is perfect for gifts celebrating special occasions like birthdays or weddings. Use ribbons with floral patterns or pastel colors to enhance the effect. What kind of gift would you like to decorate with a bow that looks like a blooming flower?
Layered Ribbon Bow
The Layered Ribbon Bow mixes different ribbons to create texture and depth. Combine ribbons of various widths, colors, or materials by stacking them before forming your bow. Tie all the layers together in one knot, then arrange the loops so each ribbon is visible.
This bow style allows you to customize your design to fit any theme or color scheme. For example, pairing a shiny satin ribbon with a sheer organza one adds sophistication and interest. How can you use layered ribbons to reflect the personality of the gift recipient?
Troubleshooting Common Issues
Tying a perfect bow on your gift box can sometimes be tricky. You might find that your bow looks loose, the ribbon edges start to fray, or the loops aren’t quite even. These common issues can make your beautifully wrapped gift look less polished than you want.
Don’t worry—these problems are easy to fix once you know what to look for. Let’s dive into some practical tips that can help you troubleshoot and improve your bow-tying skills quickly.
Fixing Loose Bows
If your bow feels like it’s slipping or coming undone, it’s probably not tight enough. Try pulling the ribbon ends firmly while holding the center knot in place. This extra tension helps the bow stay secure.
Another trick is to double-knot the ribbon under the bow before making the loops. This gives you a stronger base to build your bow on. Do you notice your ribbon slipping on certain materials? Adding a tiny dab of glue or a piece of double-sided tape under the knot can add grip without damaging your ribbon.
Preventing Ribbon Fraying
Frayed ribbon edges make your gift look unfinished. To stop this, use sharp scissors to cut the ribbon cleanly. Avoid pulling or tearing the ribbon, as this causes more fraying.
If you’re working with fabric ribbons, lightly singe the edges with a lighter or candle flame—just a quick pass will seal the fibers. Be careful not to burn the ribbon or your fingers! For synthetic ribbons, a small amount of clear nail polish on the edges can also prevent fraying without changing the look.
Adjusting Bow Symmetry
Uneven loops can make your bow look sloppy. After tying, spread out each loop evenly with your fingers. Take a moment to compare the size of each side and adjust by gently pulling the loops or ribbon tails.
Sometimes, your ribbon might be twisted inside the bow, affecting symmetry. Smooth out any twists before tightening the knot. Have you tried placing your bow on a flat surface to check its shape before finishing? This simple step can help you catch asymmetry early and fix it easily.
Creative Bow Enhancements
Enhancing your bow can make a simple gift box stand out with a touch of personality and charm. Creative bow enhancements add texture, color, and detail that reflect your style and the occasion. These small touches can transform your gift from ordinary to memorable.
Adding Decorative Elements
Think beyond just ribbon. Small decorations like tiny pine cones, fresh sprigs of rosemary, or colorful beads can give your bow a unique flair.
Attach these elements by threading them through the bow loops or securing them with a thin wire. This adds depth and a tactile feel that invites closer inspection.
Have you ever noticed how a small accent can change the whole vibe of a gift? Try mixing natural and shiny materials for unexpected contrast.
Using Wire-edged Ribbons
Wire-edged ribbons hold their shape better than regular ribbons, letting you create fuller, more defined bows. The wire makes it easy to fluff and position each loop just right.
These ribbons come in various widths and textures, so you can match your bow style to the gift and occasion. Experiment with layering different colors or patterns for a custom look.
Do you want your bow to look professionally done without the fuss? Wire-edged ribbons are your secret weapon to achieve that effortless elegance.
Incorporating Personalized Tags
Adding a personalized tag to your bow is a simple way to make your gift feel special and thoughtful. Use tags with handwritten notes, names, or small messages tailored to the recipient.
Attach tags by tying them into the bow or clipping them with a tiny decorative clothespin. This small addition shows you put extra thought into the presentation.
What message would you want to leave that makes your gift unforgettable? Personalized tags let your bow speak for you before the gift is even opened.
Maintaining Bow Shape
Keeping a bow’s shape is key to a neat, attractive gift box. A well-maintained bow adds charm and shows care. Bows can lose form during storage or transport. Simple steps help keep them fresh and lively.
Storage Tips
- Store bows in a cool, dry place away from sunlight.
- Use a box or container to protect bows from dust.
- Place tissue paper around the bow to keep its shape.
- Avoid crushing bows under heavy items.
- Hang bows on hooks if possible to prevent flattening.
Refreshing Bows After Transport
Transport can flatten or wrinkle bows. Gently fluff the loops with your fingers. Pull each loop outward to restore volume. Lightly mist the bow with water for fabric ribbons.
Use a hairdryer on low heat to reshape synthetic ribbons. Avoid high heat to prevent damage. Smooth out wrinkles by hand after drying. Small fixes make bows look brand new.

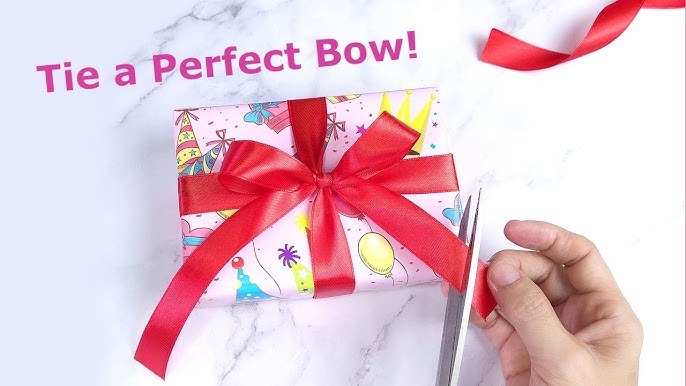
Credit: www.youtube.com
Frequently Asked Questions
How Do You Start Tying A Bow On A Gift Box?
Begin by wrapping the ribbon around the box evenly. Cross the ends underneath, then bring them back to the top. Make sure the ribbon is snug but not too tight before creating the loops for the bow.
What Type Of Ribbon Is Best For Gift Bows?
Satin and grosgrain ribbons work best for gift bows. They hold shape well and add a polished look. Choose a width that suits the box size for a balanced appearance.
How Can I Make A Bow Look Fuller And Neater?
Use multiple loops and layers when tying the bow. Fluff and adjust the loops evenly. Trim ribbon ends at an angle for a professional finish.
Can I Tie A Bow Without Wire-edged Ribbon?
Yes, but wire-edged ribbon holds shape better. Without wire, carefully twist and adjust loops to keep the bow neat. Use a double knot to secure it tightly.
Conclusion
Tying a bow on a gift box adds a special touch. It shows care and makes the gift look nice. Practice a few times to get it right. Use ribbon that fits the box size for best results. Simple steps can create a beautiful bow quickly.
Now, you can wrap gifts with confidence. Your friends and family will appreciate the effort. Enjoy making your presents look extra special every time.

Similar Posts